ARM Terminal v4: Flat Hack
Before we get too far into this post, it should be noted that most of the parts I used for this build were those on hand. Most of the design happened over a long weekend in late January 2024. For those of you that want to build this, the parts list is just below, and the files are available in a members-only post. If you sign up for just a month it's $5, but if you toggle the slider, it's only $30 for the year. Between that and the commissions from the links below, it's where my project funding comes from. I really appreciate all the people already supporting my work. It's because of that support I can run a site with no ads, and no paid placement or "sponsorships".
Parts List
- Bambu PETG-CF (Black) or (Grey) if black isn't available. They are quite close in color.
- M4x8mm socket cap screws (should only need a handful of these for the main frame, but some longer 20mm ones are also needed)
- M3x8mm socket cap screws (The bulk of the side panels use these, get 50 or 100 of them)
- M2.5x8mm socket cap screws (should only need a few of these for board mounting, the Beelink uses M2.5 and the Mikrotik uses 3 M3's and 1 M2.5)
- Waveshare 13.3" 2K AMOLED Display
- Beelink S12 Pro mini-pc (disassembled to remove SATA drive and enclosure)
- Mikrotik hAP ac lite Router
- Adafruit Qwic Quad Alpha Display
- Adafruit Quad Rotary
- Adafruit Qt-Py 2040 Board
- 3x Qwiic jumper cables
- Short Ethernet Cable - Connect the Beelink board to the Mikrotik router.
- Short HDMI cable - This monoprice one is nice and thin.
- Short USB to USB C cable - for connecting the Beelink to the display
- Really short USB to USB C Cable for connecting the Adafruit board to the internal USB port on the Beelink
- Silicone USB C Cable
- Monitor Arm (whatever you have laying around, but this one looks cool)
- Long Ethernet from the deck to the wall outlet- remember the arm's length in choosing how long your cable needs to be.
- 5.5mm x 2.1mm DC power extension cable (the Mikrotik is 2.1mm)
- 5.5mm x 2.5mm DC power extension cable (the Beelink uses a 2.5mm jack)
Tools
I really only needed my iFixit kit and this cordless electric screwdriver. That screwdriver may be out of stock, but something similar should be fine- but you want the bit selection from the iFixit kit. Remember, a power drill is likely far too powerful for threads on m2.5 and m3 screws, and will easily strip the holes.
The concept for the Flat Hack is pretty simple- a variation on the original ARM Terminal from 2019 with the same benefits- front, side, and bottom panels connected at the edges to make a box. Want the box deeper? Make the side panels deeper. Want to use a different n100 board or router? Make a new adapter plate. While the original made heavy use of heat-set inserts, a number of articles and videos seem to indicate their strength is largely a wash.
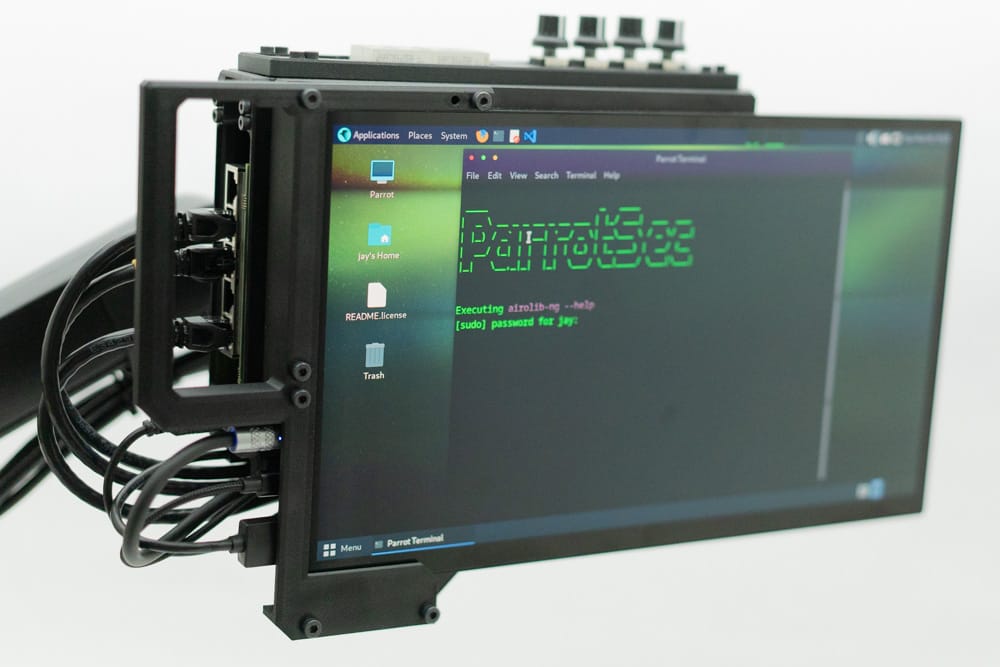
"So what does it do?" is something that people on Reddit would ask back when Reddit was relevant, but the question remains- this build is for me testing behind and in front of routers without messing with the main office network. Want to learn how reverse proxies work? Throw this on your network, and the n100 board and display is behind the little router on it's own network- no need to publish to the internet to test. Just need to have a quick PC on the office network? Patch it over without crawling under the desk. Want to do home lab wifi network security testing? Parrot OS runs great on it. I tend to advise against Kali these days unless you're running it in a VM- I had continued issues with GRUB that appear to be a known unresolved issue at the time of publishing this article.
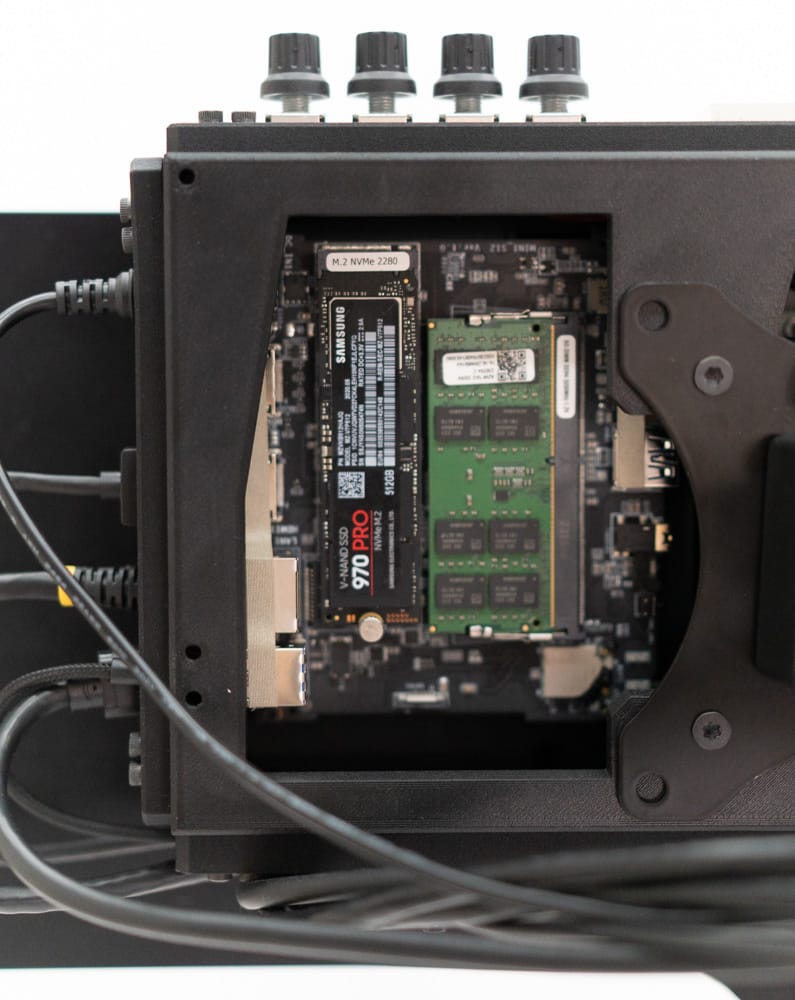
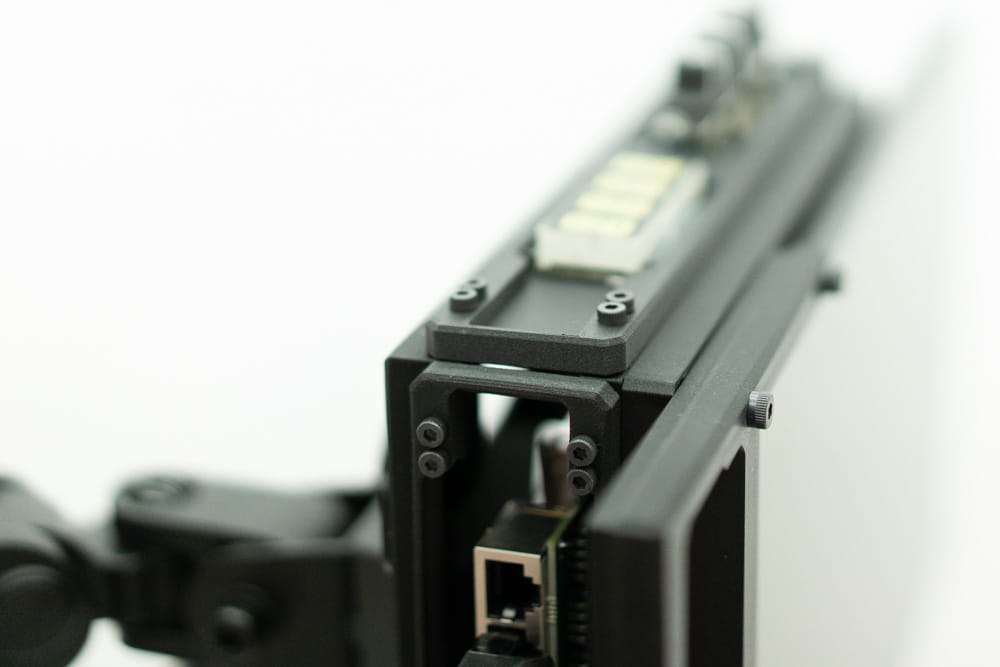
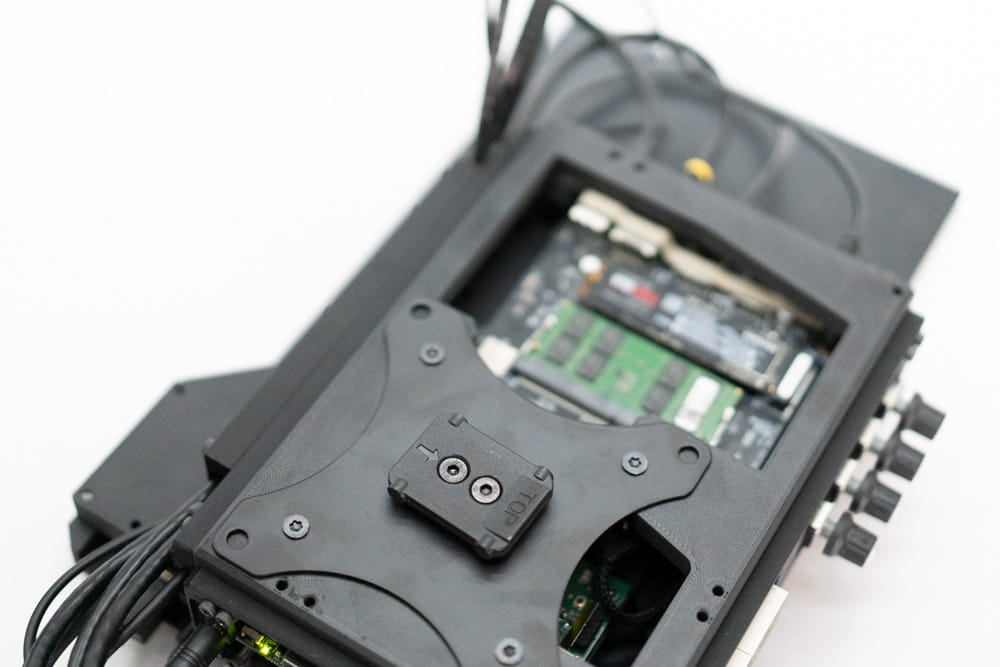
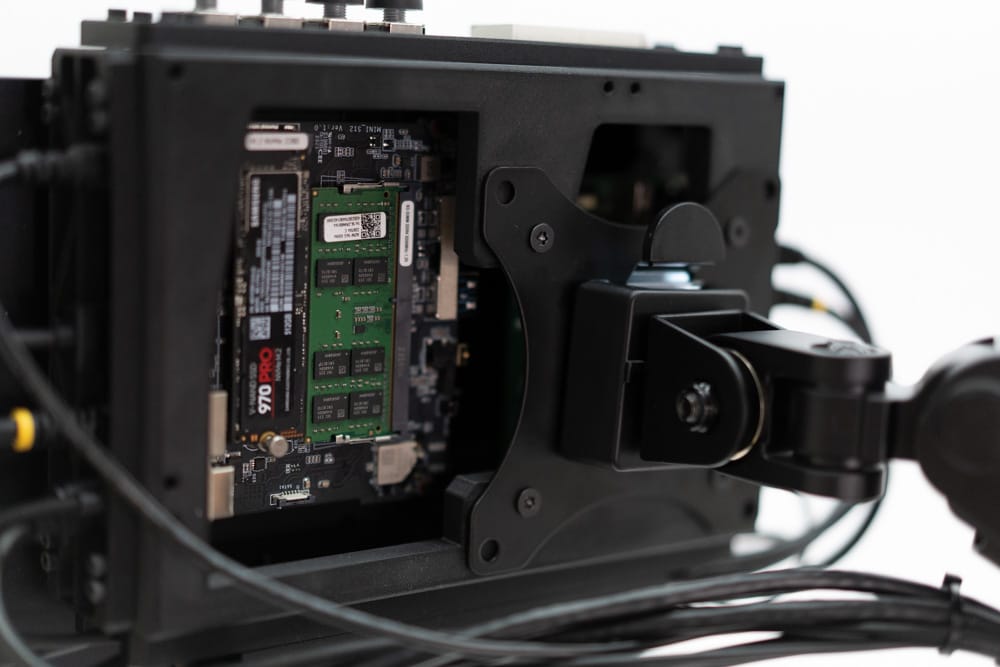
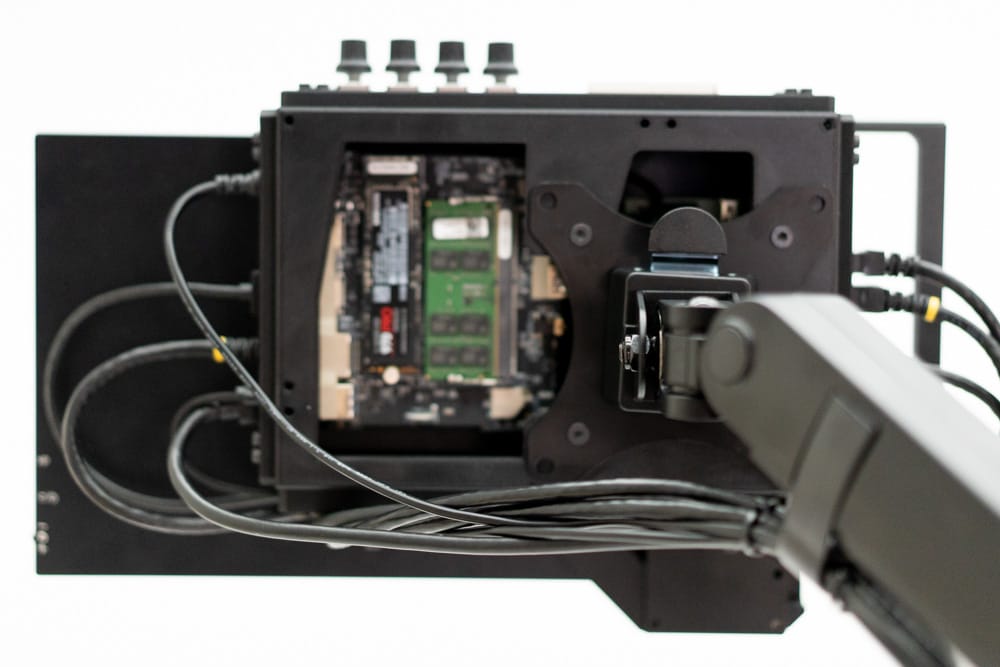
As you can see from the back, I designed a panel to make it easy to swap out the M.2 and RAM- the M.2 has a thumbscrew instead of those evil little tiny screws that fall into the cracks of the earth's crust. There's more to this than just a PC in a box though, I have added four rotary switches and a quad alphanumeric display via the Adafruit Qt-Py 2040, which shows up as storage to the host OS. You can have the rotary knobs emulate key switches, or interact with the 4 character display. This is still in active development though, but you really could have them do whatever you want.
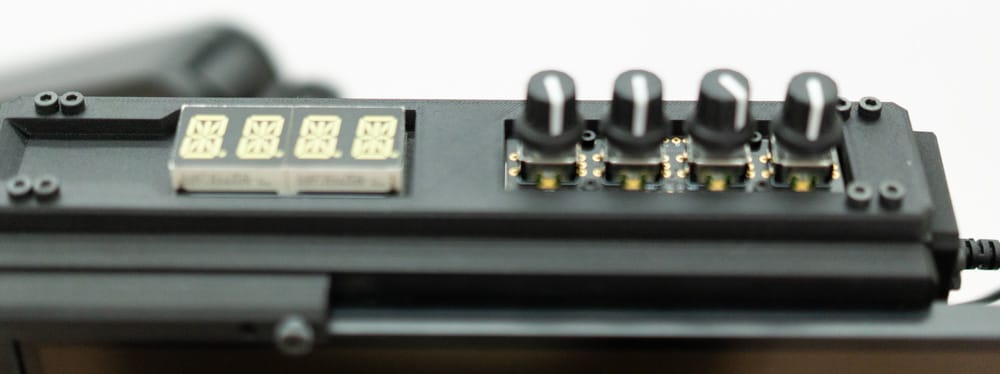
That Adafruit 2040 board hides just under the top panel:
The Qt-Py is small enough that there's no room for any real mounting holes, which means we need a way to sandwich the board. The build for the Flat Hack has carbon fiber PETG filament, which can be conductive. This necessitated the design not actually touching any of the pins or board components. The little fins you see on that part are channels for wires in case you want to add anything. They help as a small bit of strain relief.
The overall prints are "flat pack" in nature and don't need any supports. The files are available in a different post for paid sponsors. I printed everything using Bambu Labs' Carbon X1C and PETG CF filament, this is their dark grey color. Even the chamfers don't need supports.
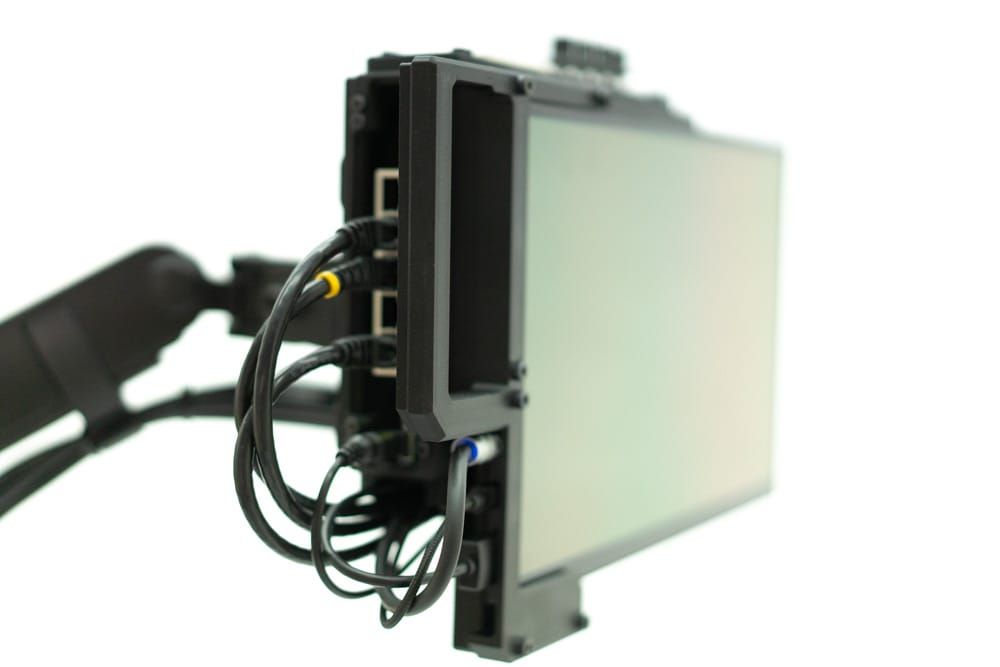
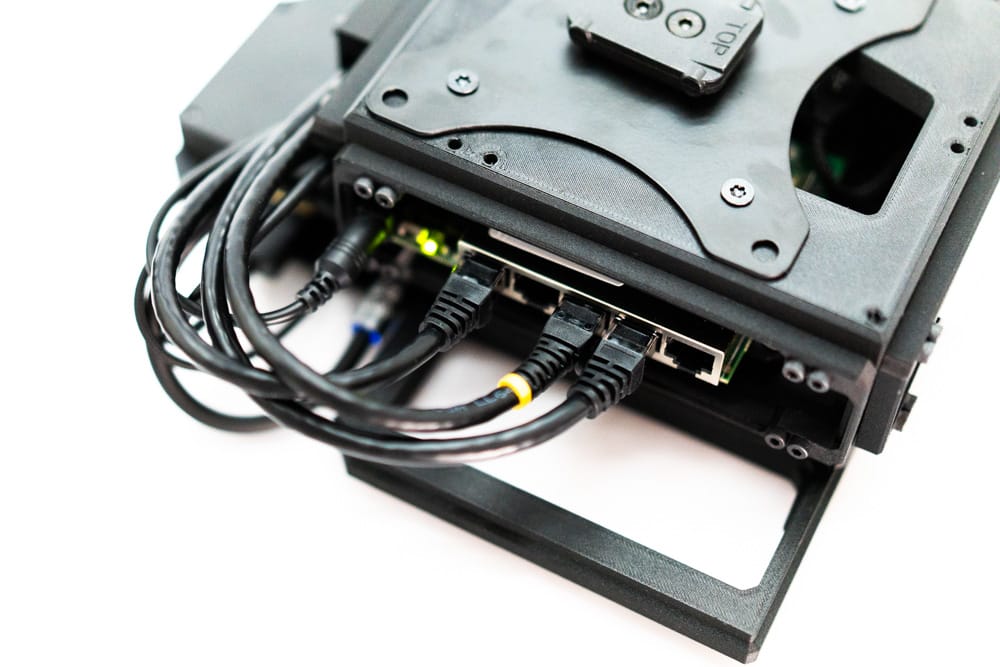
The deck does have a quick release for the monitor arm, which helps reduce the fatigue of screwing and unscrewing the M4 screws from the rear plate. As with many PC's and routers, there are plenty of additional cables, but they aren't quick release yet, so there's still a long tale of cables unless you remove the bottom cable channel cover.
As shown above and below, the handle is rigid enough to not only act as a handle when the deck is disconnected, but also as a great way to position the monitor.
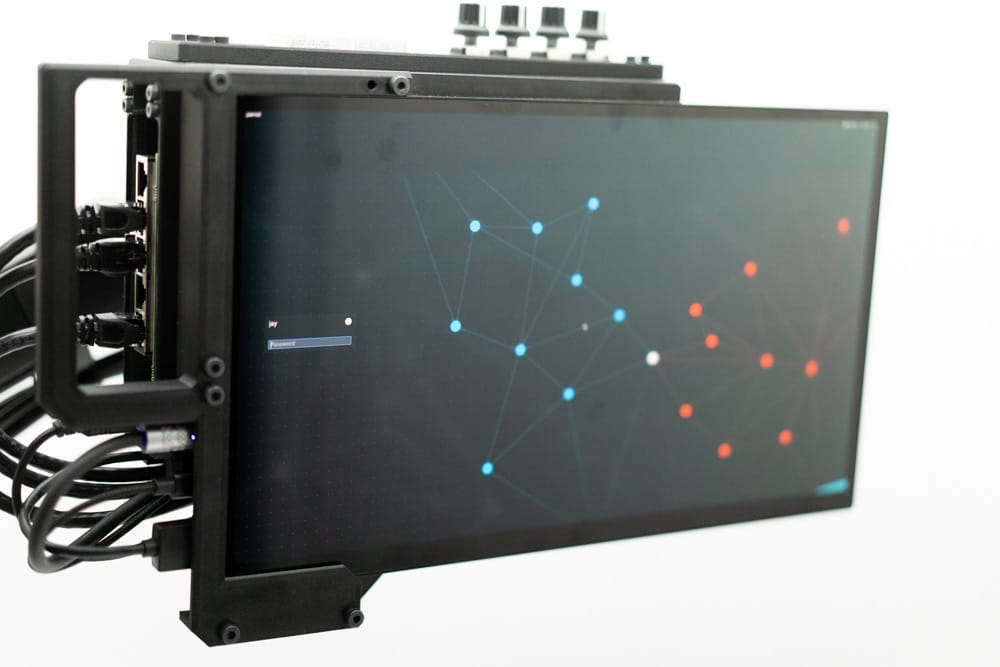
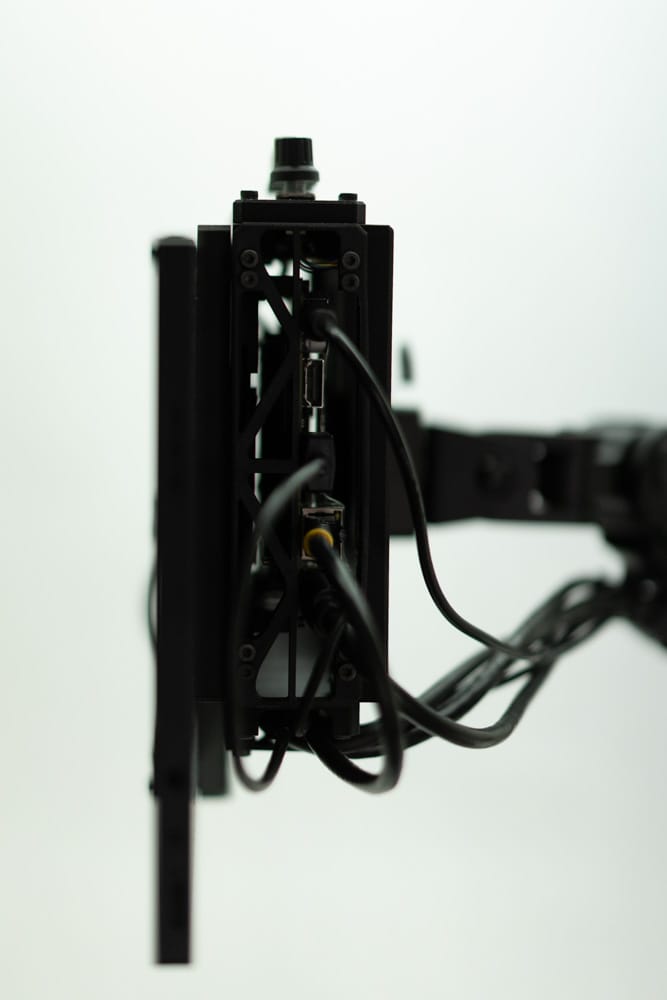
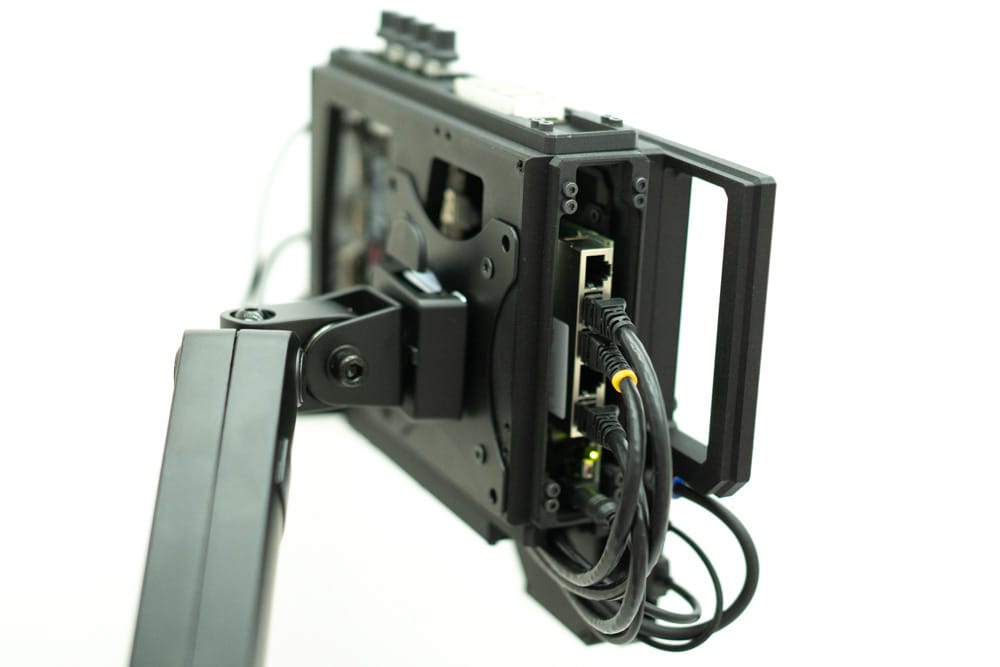
Looking at the deck from the side, you can see the USB and HDMI connectors, as well as the Ethernet. The Ethernet runs along with a USB cable through the channel on the bottom of the case to keep cables tidy. Besides just the HDMI, the USB connection to the monitor allows for the touch controls of this display, which are quite good- but since this is a 2k display, you will want to use desktop scaling of 2:1 or so depending on your vision and touch size.
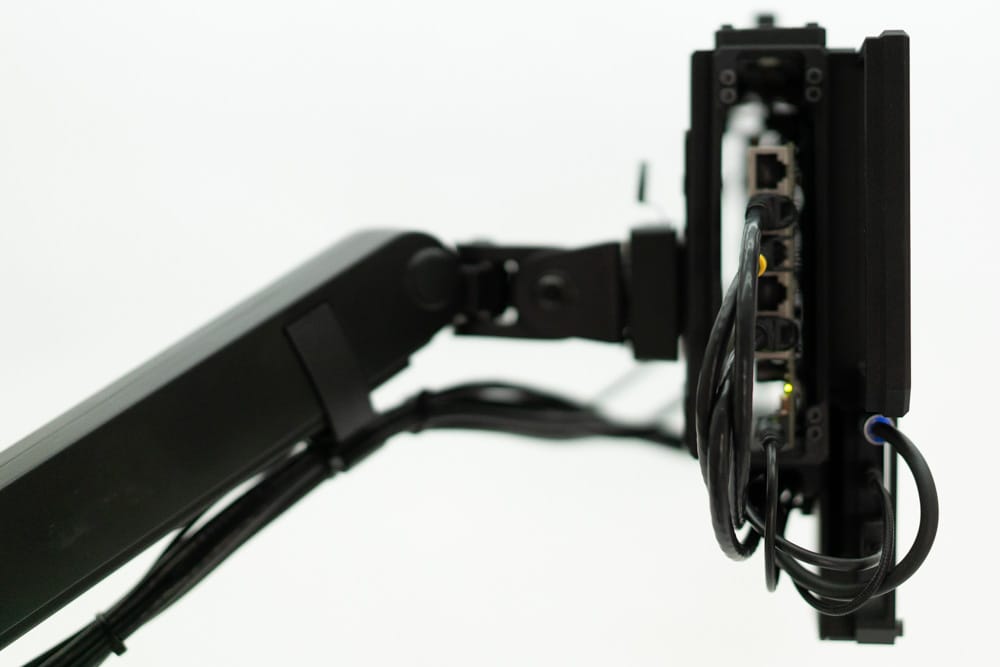
The opposite side shows the Mikrotik router's ports and reset button. Luckily many Mikrotik devices have most connections on one side of the board, even if it makes the board a little bigger. Just below you can see the connections for the display, which are USB power, USB data, and HDMI.
This build is designed to be a great way to set up some test computers, especially ones you might want to use for scanning tools and don't want to use an existing monitor. This build is also pretty modular too- aside from the goo-covered wifi connectors on the Beelink board, all of this is non-destructive. When you're done running ParrotOS, you can repurpose the parts to make your very own cyberdeck!
Finally, a big thank you to all the paid subscribers- your support enables these projects. We have a new version of the Recovery Kit coming this spring, and it's all because of your support. Thank you!


Comments ()