new workbench setup - steel channel, emt conduit, plywood, and of course 3d printed parts
New year, new builds, right? This time for me it's a workbench that is highly practical and suited for what I need. Space for me is extremely limited, but I am lucky to have the option to mount structures to my walls. This build is for my garage setup, with several different components involved. Make sure to check out the video link below where I talk about this build!
Limited Space
I feel lucky to have somewhat conditioned spaces after fighting with the seasons in a garage with no insulation, but like many I am still very short on space. I've seen many "ultimate" workstation setups that focus on glamor and expensive tools, but mine is a little simpler- I need a compact space along one wall where I can routinely share projects with all of you. I've even announced it on my YouTube channel, with a link at the bottom to my new intro.
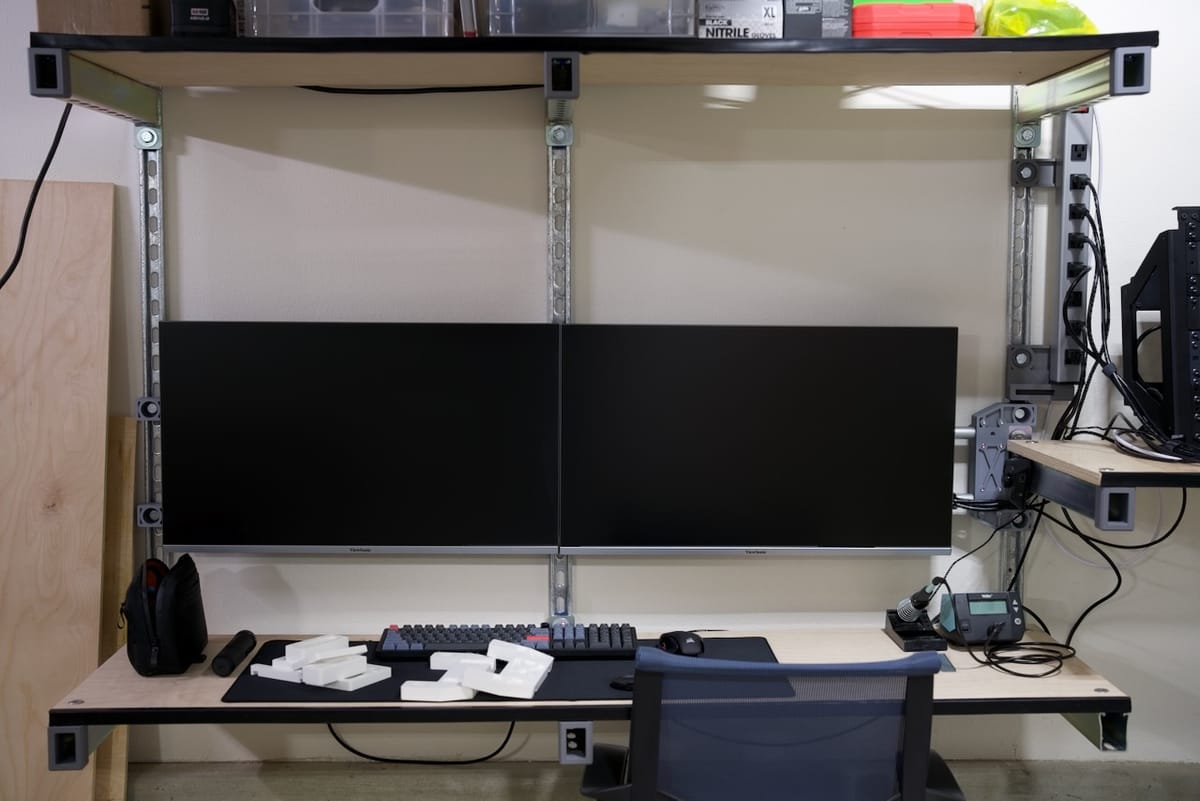
For my current situation, limited space means a little more than 8 feet (around 3 meters) along one wall of my garage, but I cannot exceed 24" of depth (~60cm). Since I need to be able to push in a chair, the shelves on my setup are a bit less at around 20", which is still a very reasonable depth. I looked into folding all shelves, but none seemed strong enough. While I may not be the first to do this approach, I couldn't find one to copy off of, so I am learning as I go. (More about this in my material selections).
The good news is that I have a tall ceiling, so well over 7 feet floor to ceiling, but my wall rails are 6 feet tall due to a foundation footing taking up the first 18 inches or so. As you can see from the photos, it's very usable, but also limited enough to push me in some deliberate directions on how to use the space.
Functionality
With steel channel or the brand name Unistrut, there are going to be some limitations. These shelves don't have unlimited weight capacity, but I just need basic storage and a flat spot for small-to-medium projects. I may end up sliding a 3D printer on the floor to the right, but for now this is my assembly and photo area for builds, along with other shelves for various projects as you will see.
I don't need to saw or hammer anything on these shelves or work surfaces, I have other surfaces for that kind of work, so light screw driver work like pressure fitting screws into 3D prints is all I really need. I do plan to add a laser engraver soon, but right now I am thinking that will go on a cart for getting closer to ventilated spaces.
Workshop, Not an Office
While there's the monitors for doing work-type stuffs here, this isn't a daytime work desk. As anyone who work from home knows, boundaries are essential. This lets me stop a creative project, sit it down, and return to it hours or even days later. I have already found this exceptionally helpful in a bunch of ways like getting space from a build so I can think creatively about it. When you've had a build sitting near your desk for months on end, it's sometimes hard to take a fresh approach. Having a separate space, no matter how modest- is helping already.
Flexibility
Whether you own the wall you are about to drill into or not, it's a big commitment. I am constantly iterating my designs, and I am increasingly careful to make them as modular as possible so I can change stuff over time. The vertical steel channel seems like the best way to approach what I need while still having a usable desk. Shelving just couldn't have the dimensions that I wanted, and although wood desks have been reliable for many, I wanted the steel channel so I could almost endlessly re-arrange them and change heights. I may find a better workspace, and when that happens this could just be traditional light shelving- or I could convert it into a longer shared desk, etc.
Components & Basic Assembly
Still with me? Great, because if you're thinking about doing something similar I can share a couple tips already. First, steel channel can be great and very dangerous. Six foot lengths of it are heavy, and getting assistance and knowing how to install it are critical to safety. If you're not sure how to find studs in your wall, use the correct hardware, or understand limits of material strengths, this project may not be for you.
Steel channel comes in a few different metal types and finishes, as well as depths. I went with half-depth steel channel for the walls, mostly because it was close to half the price of the regular depth channel. I also chose galvanized steel over stainless steel, again over cost. The trouble is that galvanized channel can be quite sharp with random and literal razor sharp flakes on it. I cut my hands several times until finally learning my lesson. I'd love to tell you that I'd go with stainless, but those rails are hundreds of dollars more, but it would be a luxurious option to consider.
From there it's pretty simple- some welded steel channel shelf supports off Amazon and some various bits from McMaster Carr like 1" long 1/2"-13 hex drive, flat head screws. Those help for keeping the shelf surface flat, but getting a chamfer on a hole that big is still a bit ugly and not quite sorted out yet. What really came in clutch was the local Home Depot, where I could buy the special rotating nuts for steel channel for cheaper than McMaster Carr or Amazon. I would have bought the channel there too, but I wanted to avoid cutting 10' pieces down to 6' for a number of reasons.
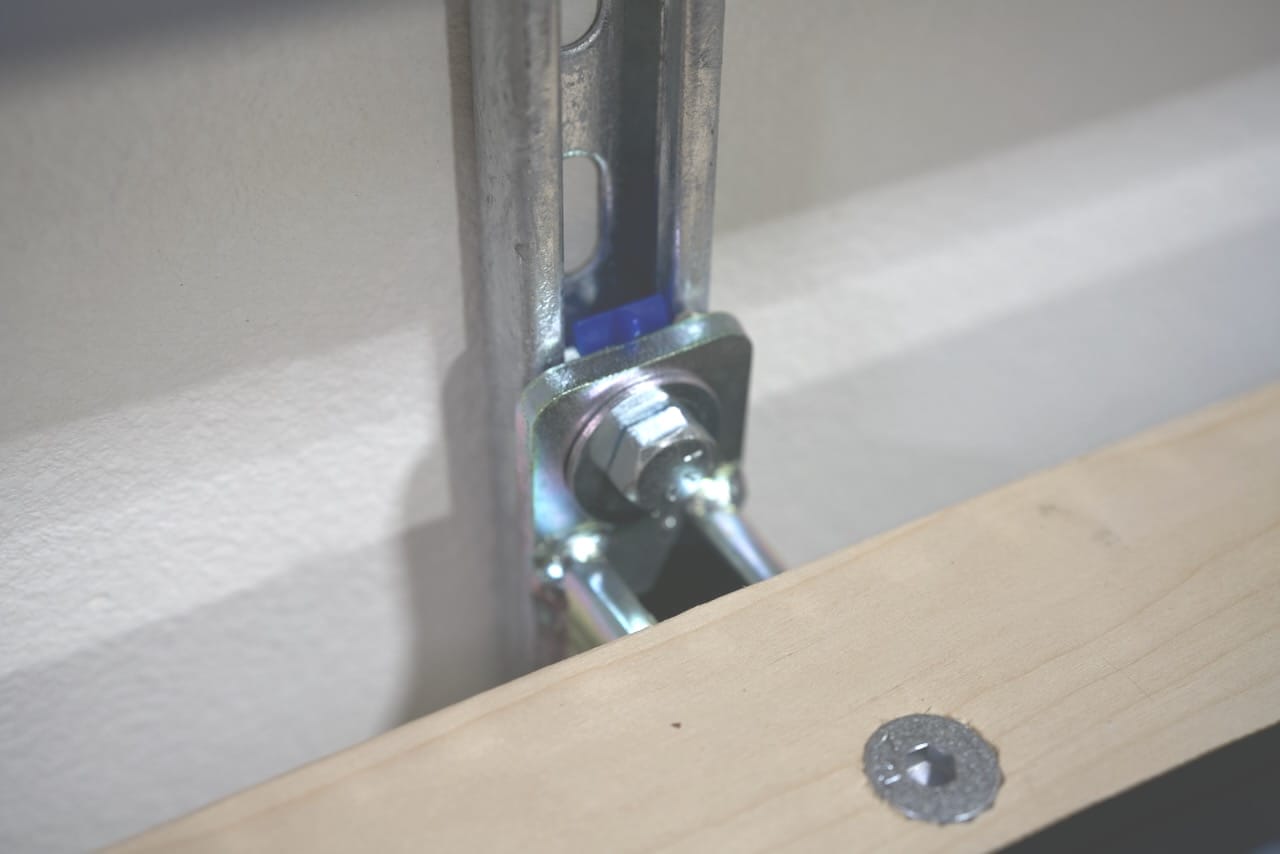
With the shelf supports bolted in place using 1/2"-13 bolts that are 1" long (remember it's half-depth channel), the real helper here was a yardstick and a traditional bubble level. Each shelf was cut at the local Home Depot and sanded down at home to keep the edges somewhat nice, and I drilled my 9/16" bit into the boards 2" from the front/back of the boards and 1" in from the ends. This was mostly to make sure I didn't crack the plywood. I am using 3/4" birch. If you're building this as well, just be sure to center your drilled holes in the channel underneath on the shelf supports, and whatever you inset from the edges along that line, make them match. Remember if you are using flat head screws, give your chamfer bit space to bite, plus room for the rubber edging that will get added to the front of the shelf later.
VESA Accepted Here
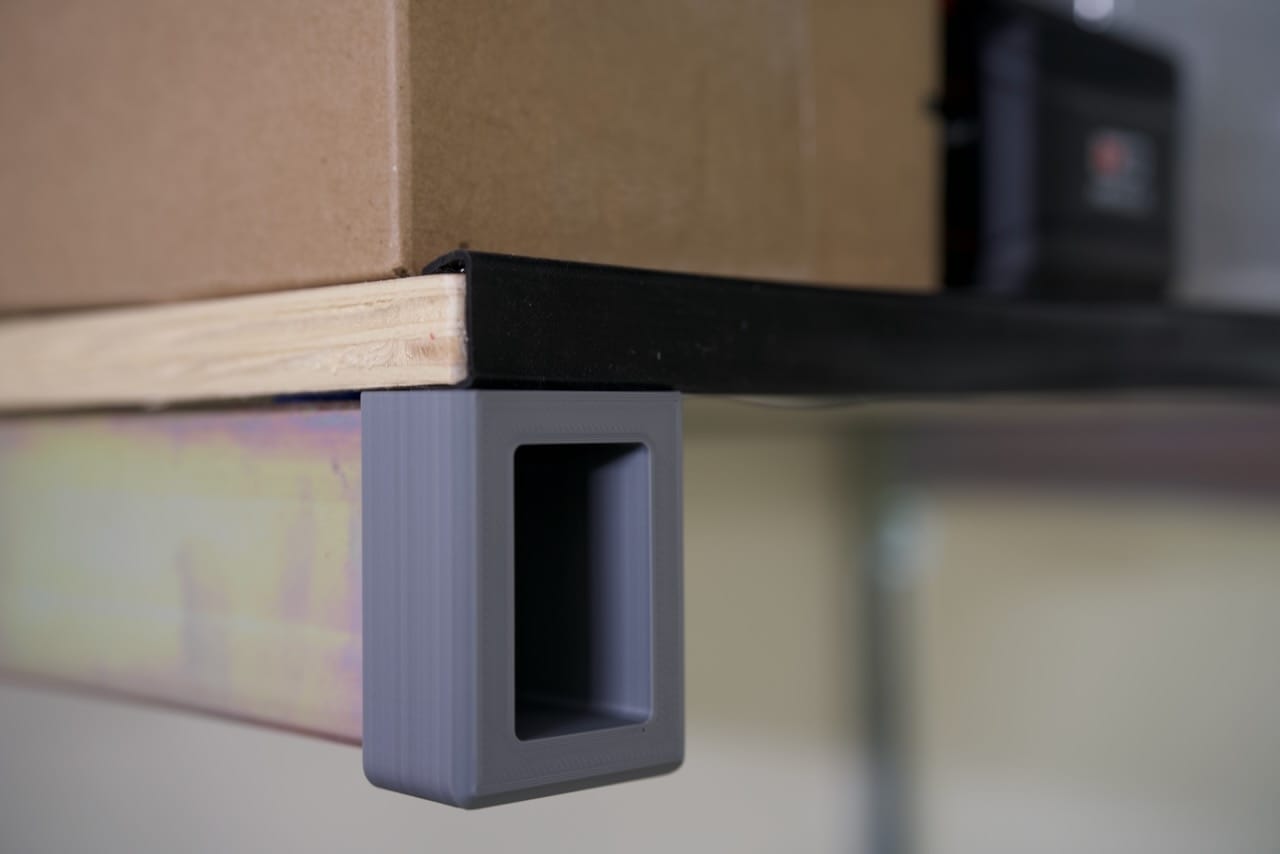
The VESA end mounts are very technical looking, and it's a shame to me that they are mostly hidden behind the monitors. They are simple though- there's a top and bottom half, with the bottom half bolting to the steel channel. In between there's the notches for 3/4" EMT steel conduit, and you can cut the conduit to length depending on how far apart your 3D printed brackets are. This helps because while studs in walls are supposed to be mounted at a consistent spacing, this isn't always the case. Anyway, with these end parts the notches are about 2mm too shallow, so the 3D printed parts clamp onto the EMT conduit. There is a center support model not shown that can support the conduit for longer runs. Shown below are some sample prints which print with minimal supports.
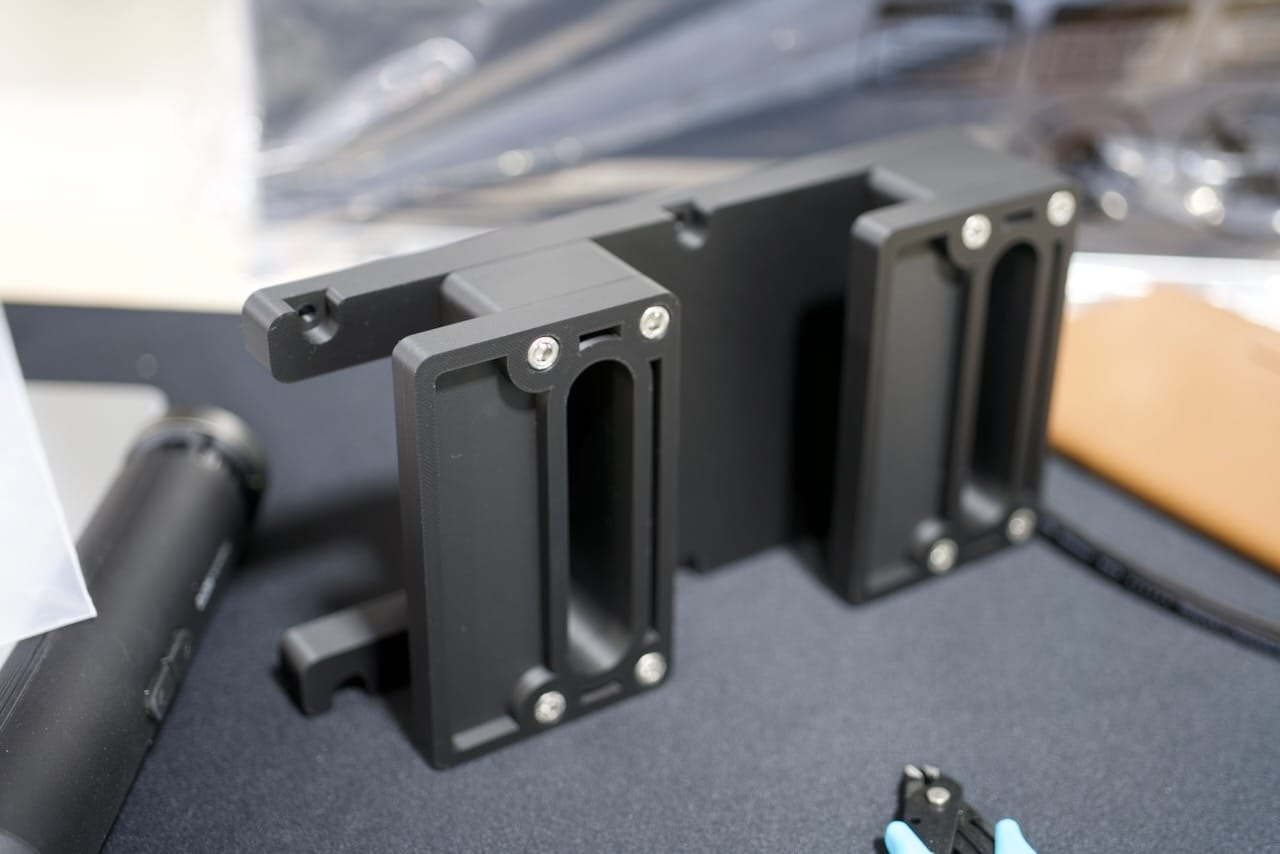
Shown below is the clamp in action- you can see the M5 screws holding the two end pieces together.

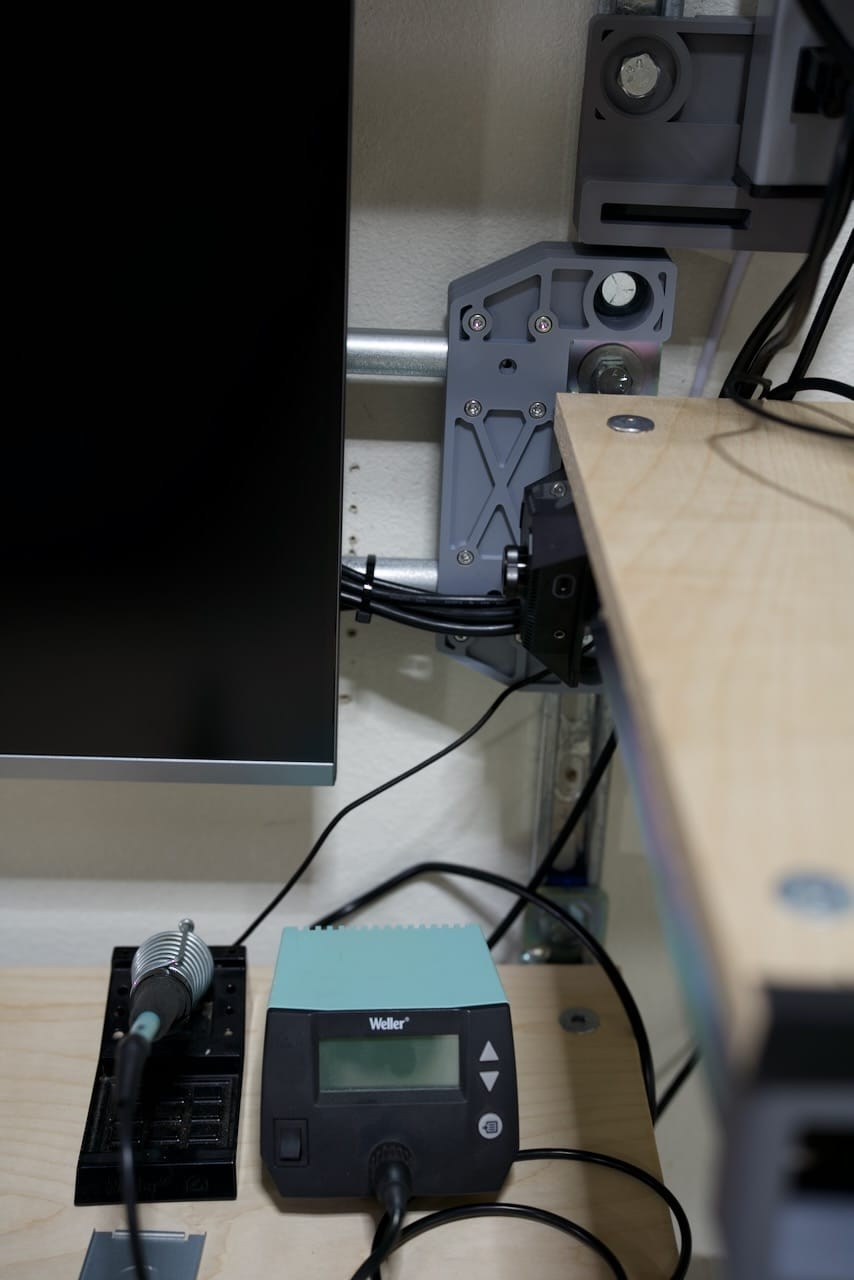
Here on the photo below you can see the right hand side with the EMT conduit more visible. I designed the parts to go around the shelf brackets since the shelf and my monitors were around the same height. You can see the 1/2"-13 bolt holding the bracket to the channel, and you can see the M5 screws holding the top and bottom parts together. I have a hole for a set screw, but I didn't need it for this installation.
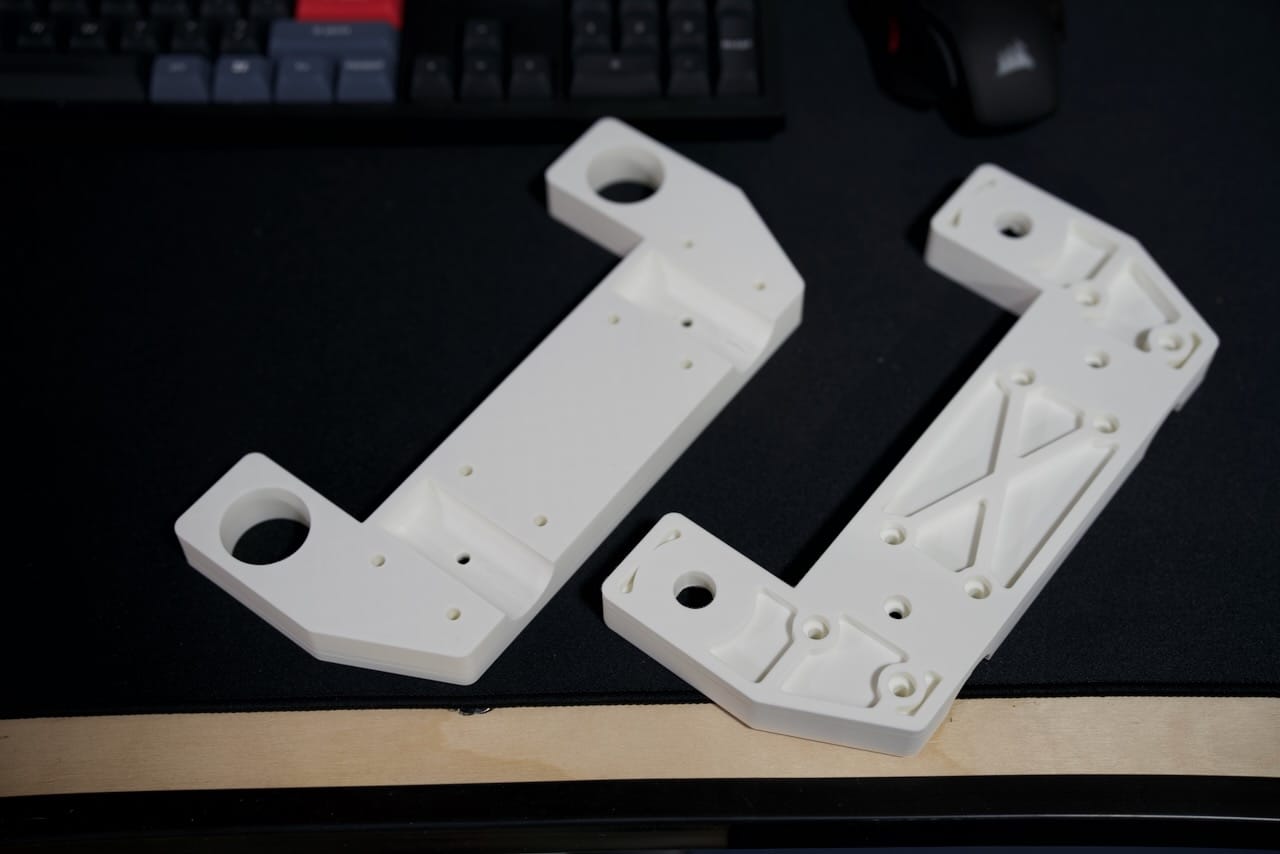
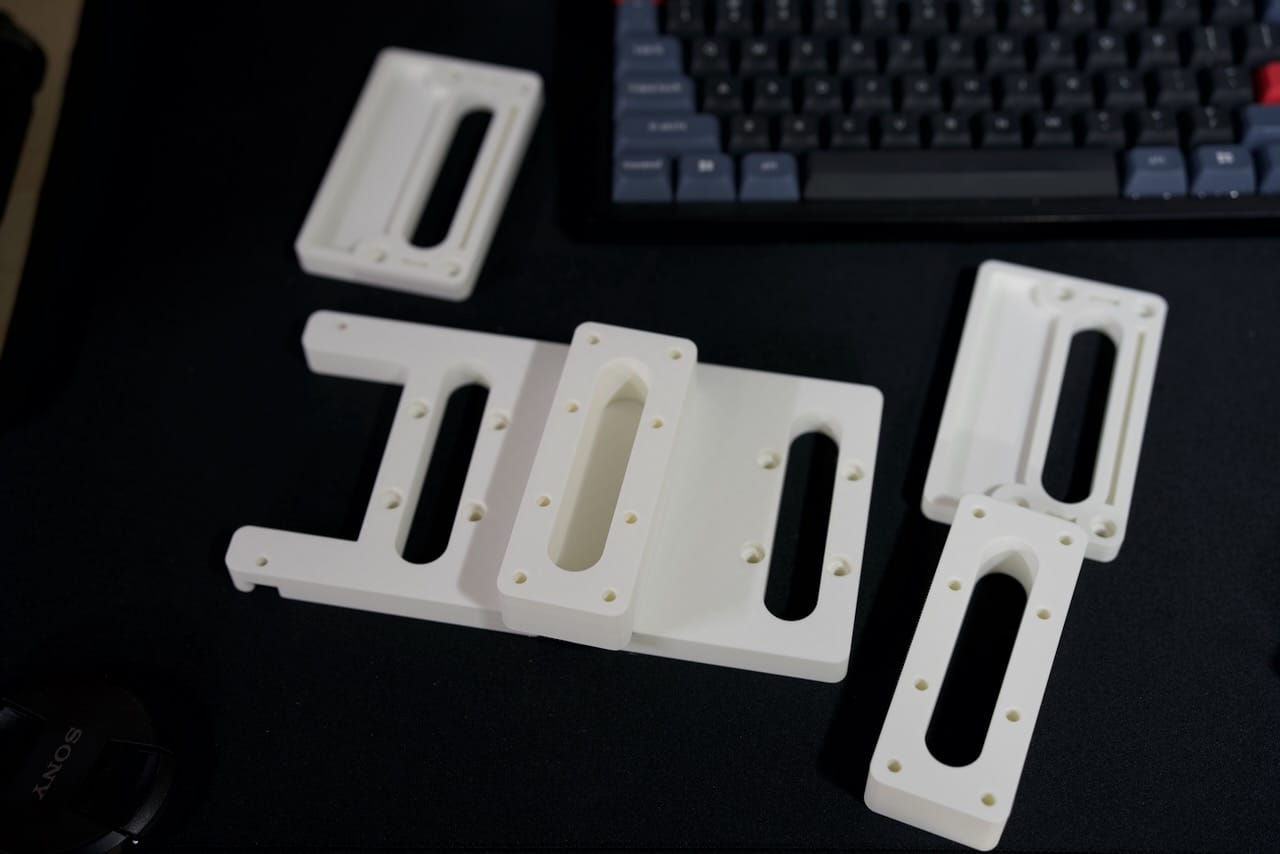
shown below are the parts 3D printed for the VESA hanger- they all fit on the bed of a Bambu X1C in a single print, but take a while given these are structural parts. They don't need to hold too much, since the Viewsonic monitors are pretty light. This also means the monitors are hanging on the EMT conduit, so they can be easily lifted off when needed.
The assembled version makes a little more sense though- you can see the assembled version in black below. This screws onto the back of the monitor with M4 screws, I recommend 15mm but you will want to check for your specific monitor.
Key Concepts and Lessons Learned
As I write this the number one lesson is that galvanized steel can be very sharp! The desk itself is still going strong, but I would probably look for low profile hex bolts and a forstner bit instead of the flat head screws. The chamfer bits for a 1/2" bolt are quite big and make for some rough holes in the plywood, but I think the bolt holes will get covered with stickers at some point.
While I am still early on in using the desk, I think even more outlets are needed- and I am grateful my setup includes a dedicated 30A outlet- so if you are looking to replicate it make sure you have sufficient power.
Future Plans
I am currently thinking of how I can integrate some rolling work areas for a laser engraver and a 3D printer to the right hand side of the desk. This will help keep things modular for me, especially as I want to wheel the laser out closer to the garage door for use and ventilation.
I am also working on some additional task lighting to help with fine detail work- that will take me a month or so to get going, but it's coming soon!
Parts List
While the 3D parts for the VESA mount and power strip are for paid subscribers only, the rest of the parts list is below, and pretty accessible via Amazon and Home Depot. While I do earn a small commission from each item purchased from some of these links, there is no cost to you and all my builds are chosen with the best parts first.
- Vertical Rails - Half Depth Steel Channel - McMaster Carr
- 1/4" Lag bolts for mounting channel to studs - Home Depot
- Steel Shelf Brackets - Amazon
- Steel Channel Nuts - Amazon or Home Depot
- 3/4" Birch Plywood - Home Depot
- Adhesive Edge Trim (for shelves) - Amazon
- Hex Drive 1/2"-13 1.5" Flat Head Screws (for shelves) - McMaster Carr
- 1/2"-13 bolts (1" long) - Home Depot
- Washers (needed for shelves) - Home Depot
- 3/4" EMT Conduit - Home Depot
- M5x30mm Stainless Steel Socket Head Screws - Amazon
- Power Strip - McMaster Carr
- Viewsonic Monitors - Amazon
- 3/8" Drive 5/16" Hex Bit Driver (for countertop bolts) - Home Depot
- Driver Kit for Impact Driver - Home Depot
- 3D Printed Parts - doscher.com
Recommended Tools
- Work Gloves (seriously, the galvanized parts are sharp) - Amazon or Home Depot
- Electric Drill with a clutch (over-tightening the bolts on plastic parts can crush them) - Amazon (Drill/Driver Combo) or Home Depot
- Impact Driver (for mounting the metal shelves to the channel) - Amazon (Drill/Driver Combo) or Home Depot
- Bubble Level - Home Depot
- Laser Level - Home Depot
Comments ()