the compute unit
Introducing the compute unit- a modular and customizable desktop enclosure for small computers like the Latte Panda IOTA and the Raspberry Pi 5.
I increasingly look to smaller and lighter compute platforms as the core of my lab infrastructure gets more refined. Sure, it's great to have a small datacenter at your disposal, but dealing with power, heat, and noise are really pretty terrible if they're in your living space. I always look at fanless or water cooled options since they tend to be far quieter, but if we're talking big CPU's and GPU's then heat is always going to be a significant byproduct.
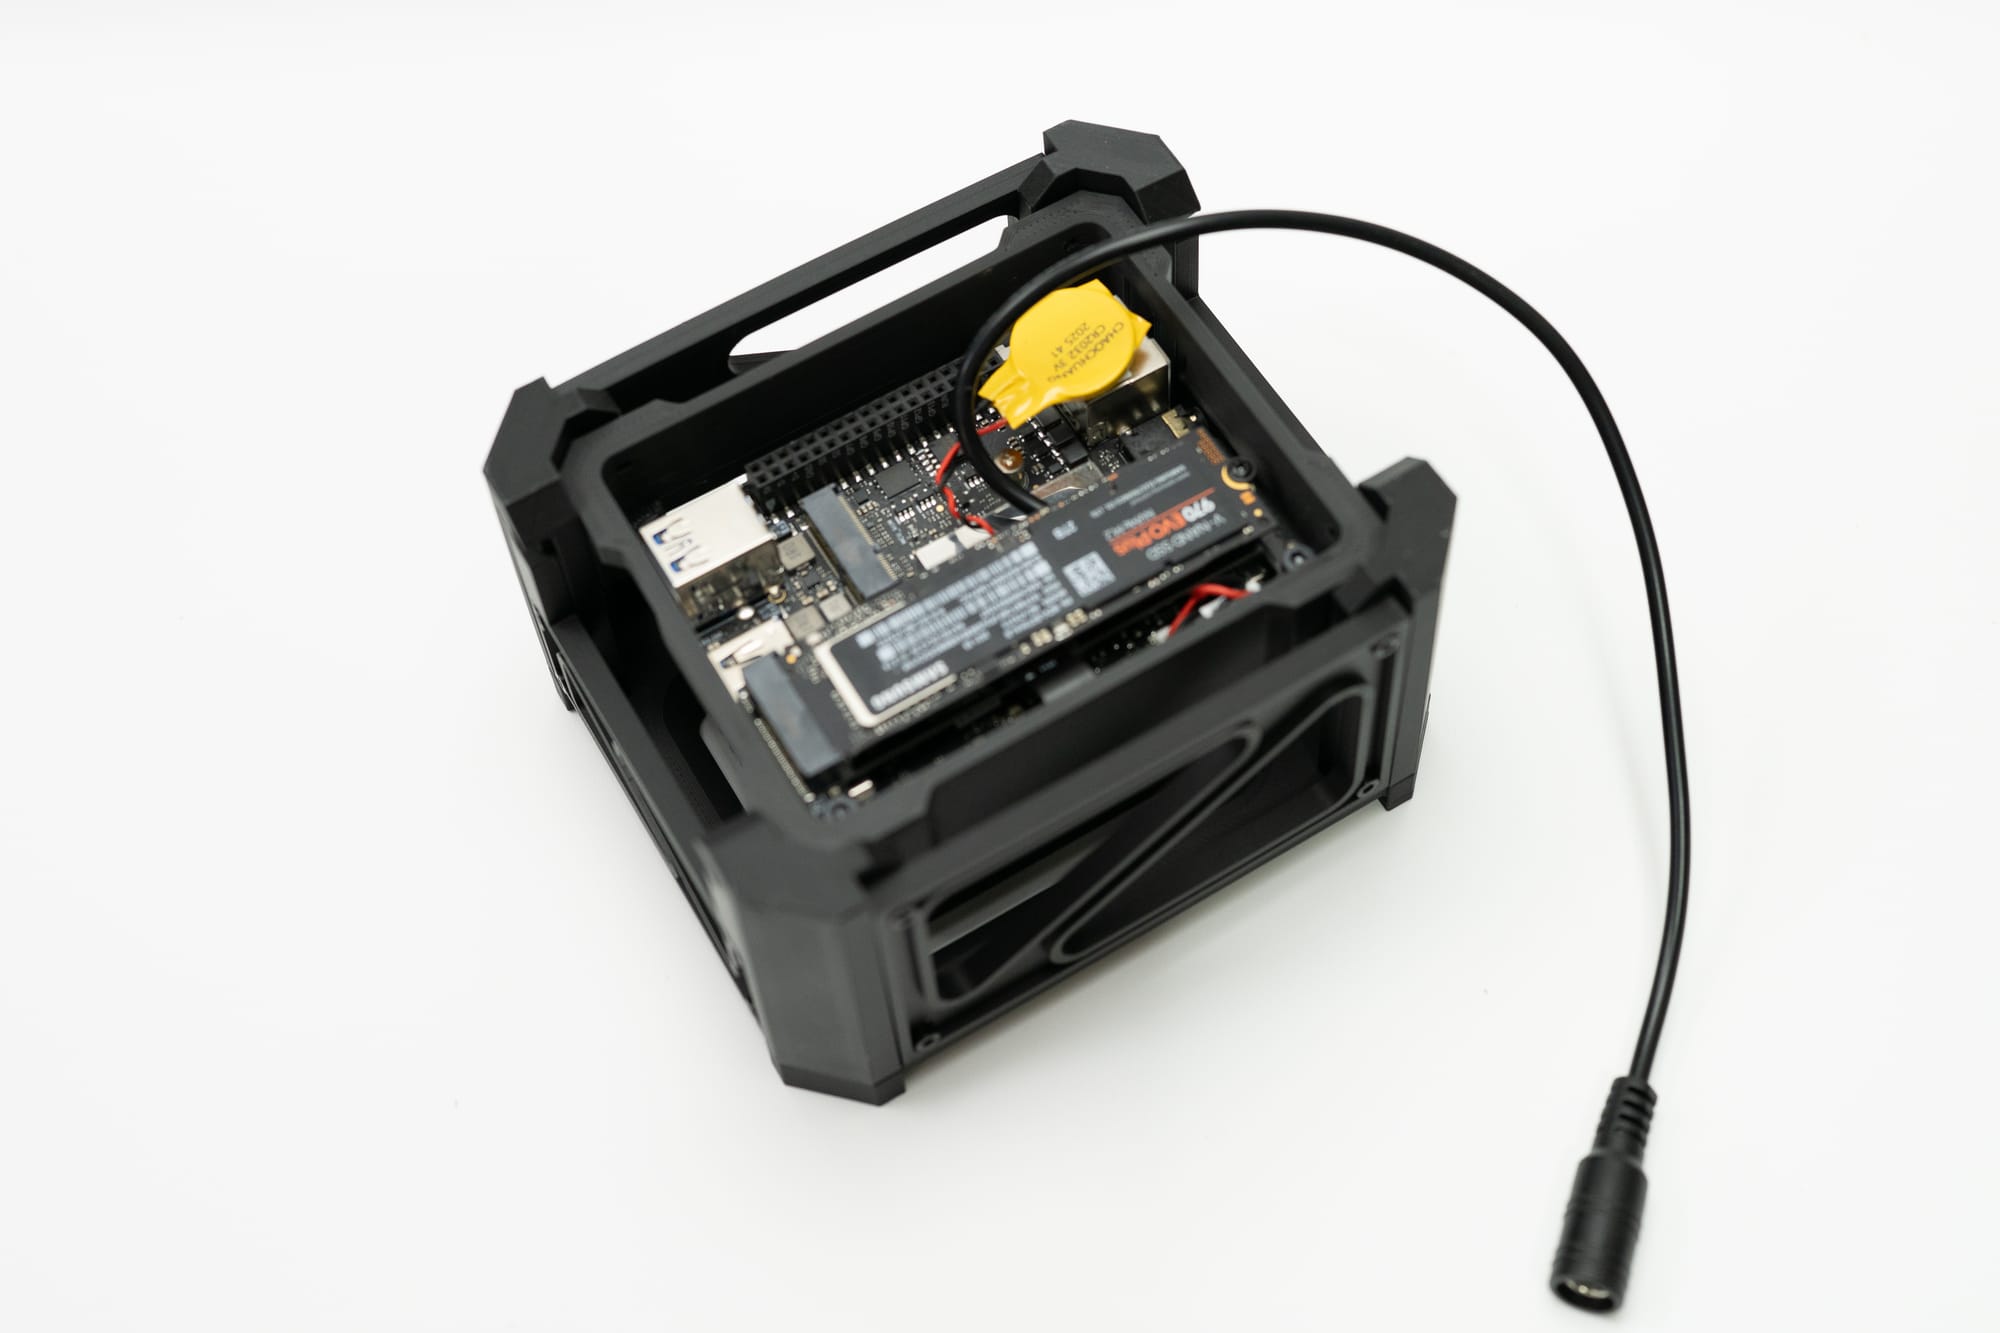
That leads me to working with the newer Latte Panda IOTA, an Intel N150-based board that offers some improvements over the N100. The N100 is one of my favorite processors of the last few years, and I often find myself preferring it for daily use on small servers over the Raspberry Pi. The N-series boards are often in all kinds of form factors, and can even come with two NVME slots out of the box, compared with all the extra hardware and cost associated with the Raspberry Pi.
Power isn't so much of an issue for the N100's, and I need to really take the N150 in this IOTA board for a spin- but I don't care for the metal box enclosure that is offered, especially since it's more for industrial use and I'd like something that can sit on my desk.
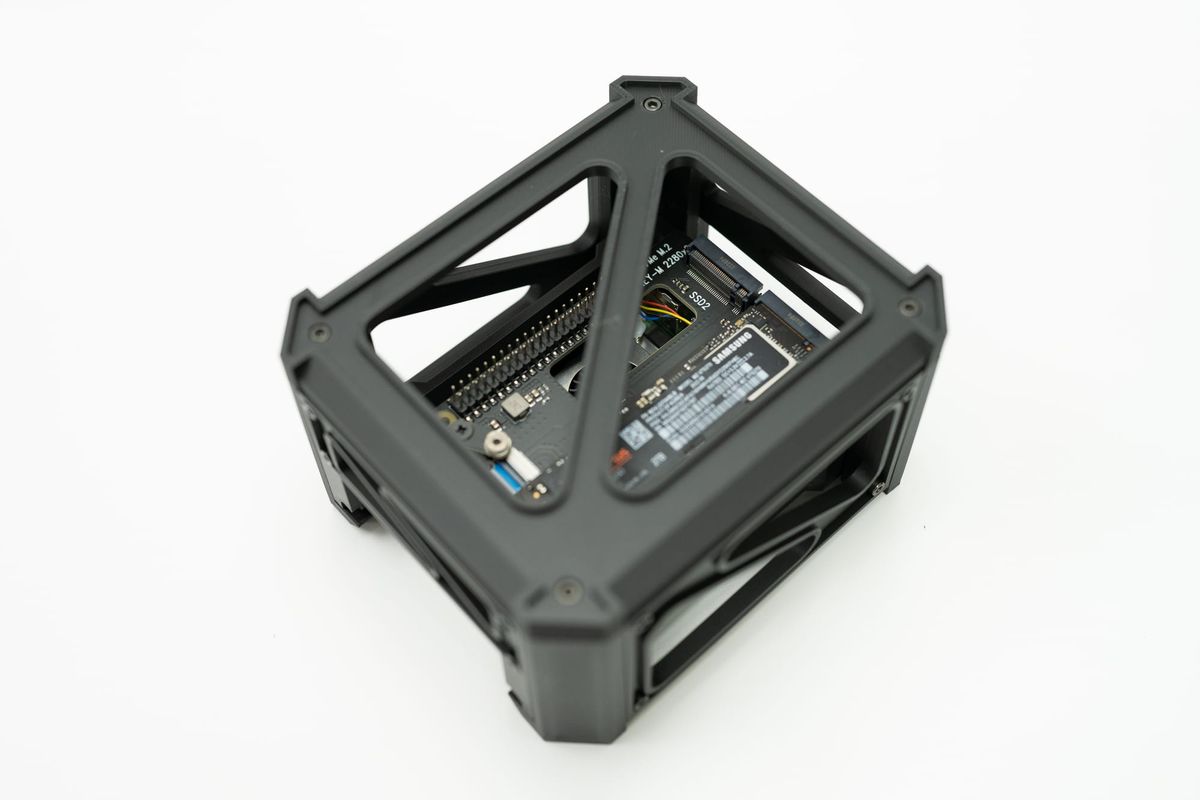
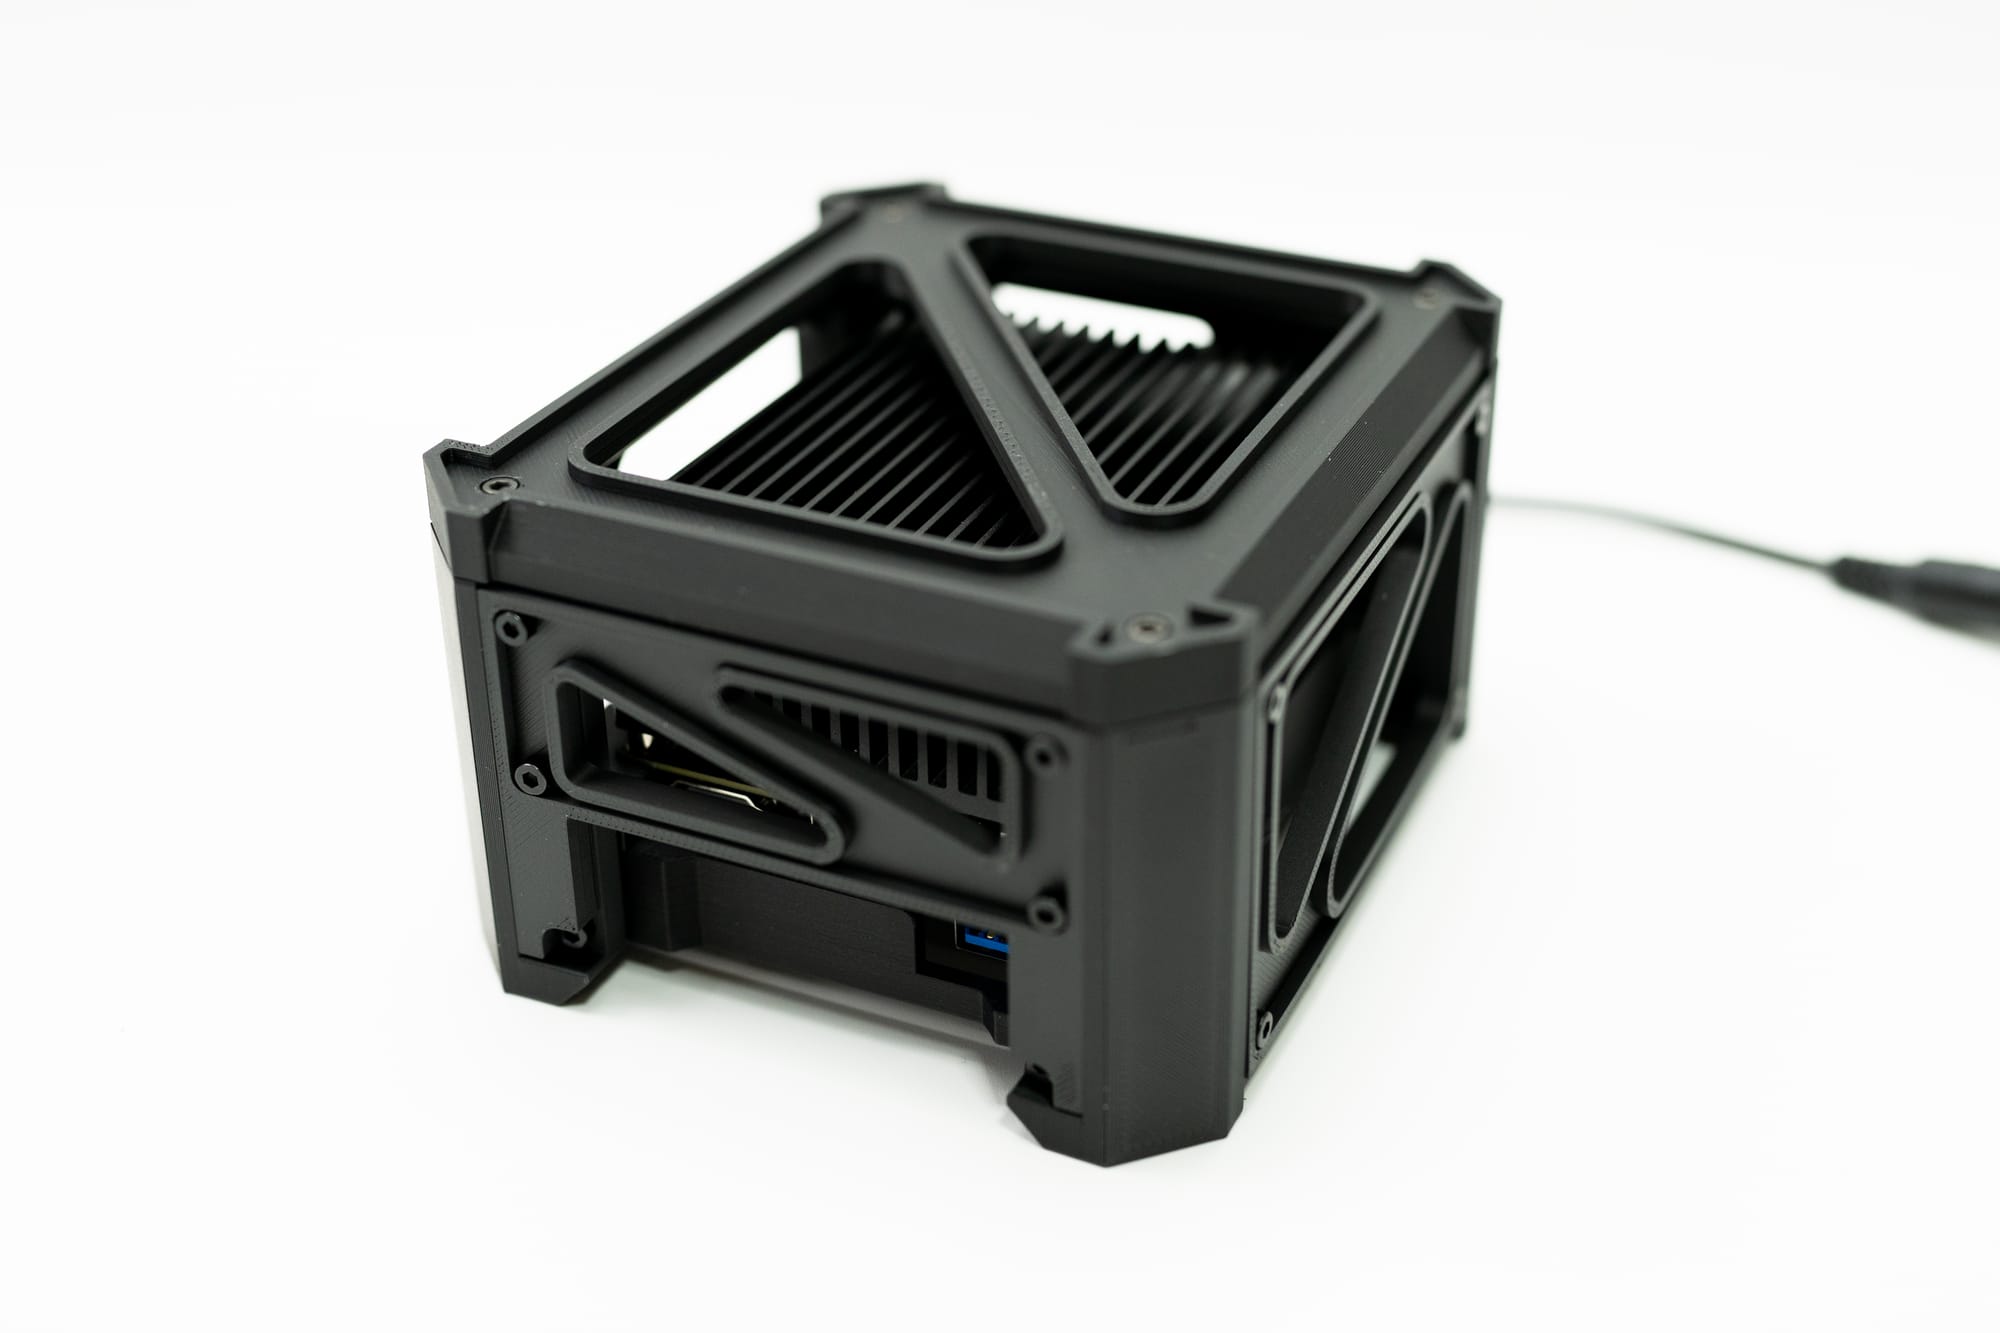
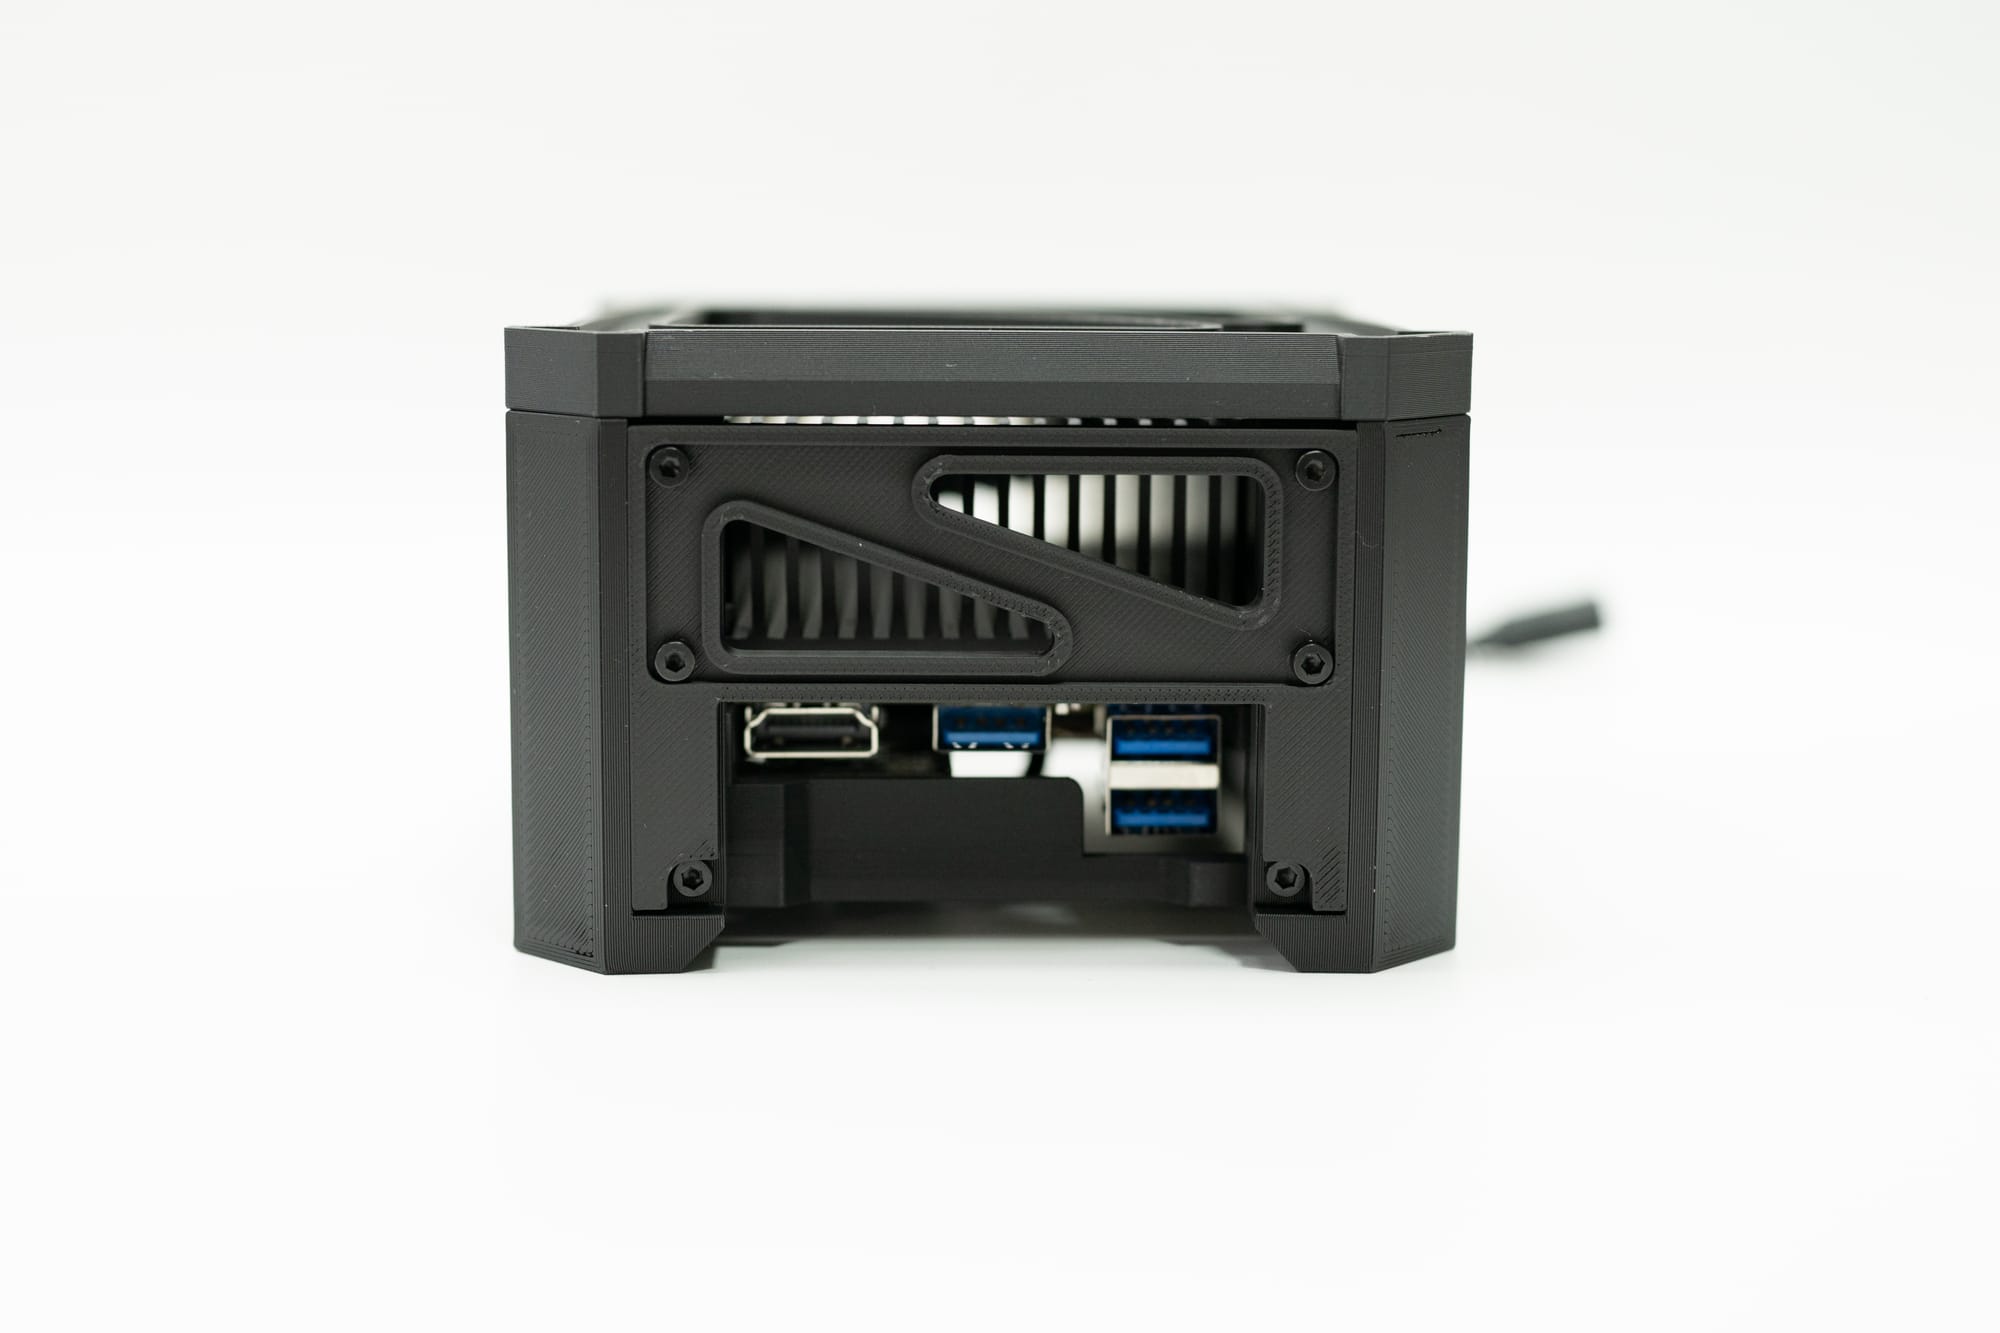
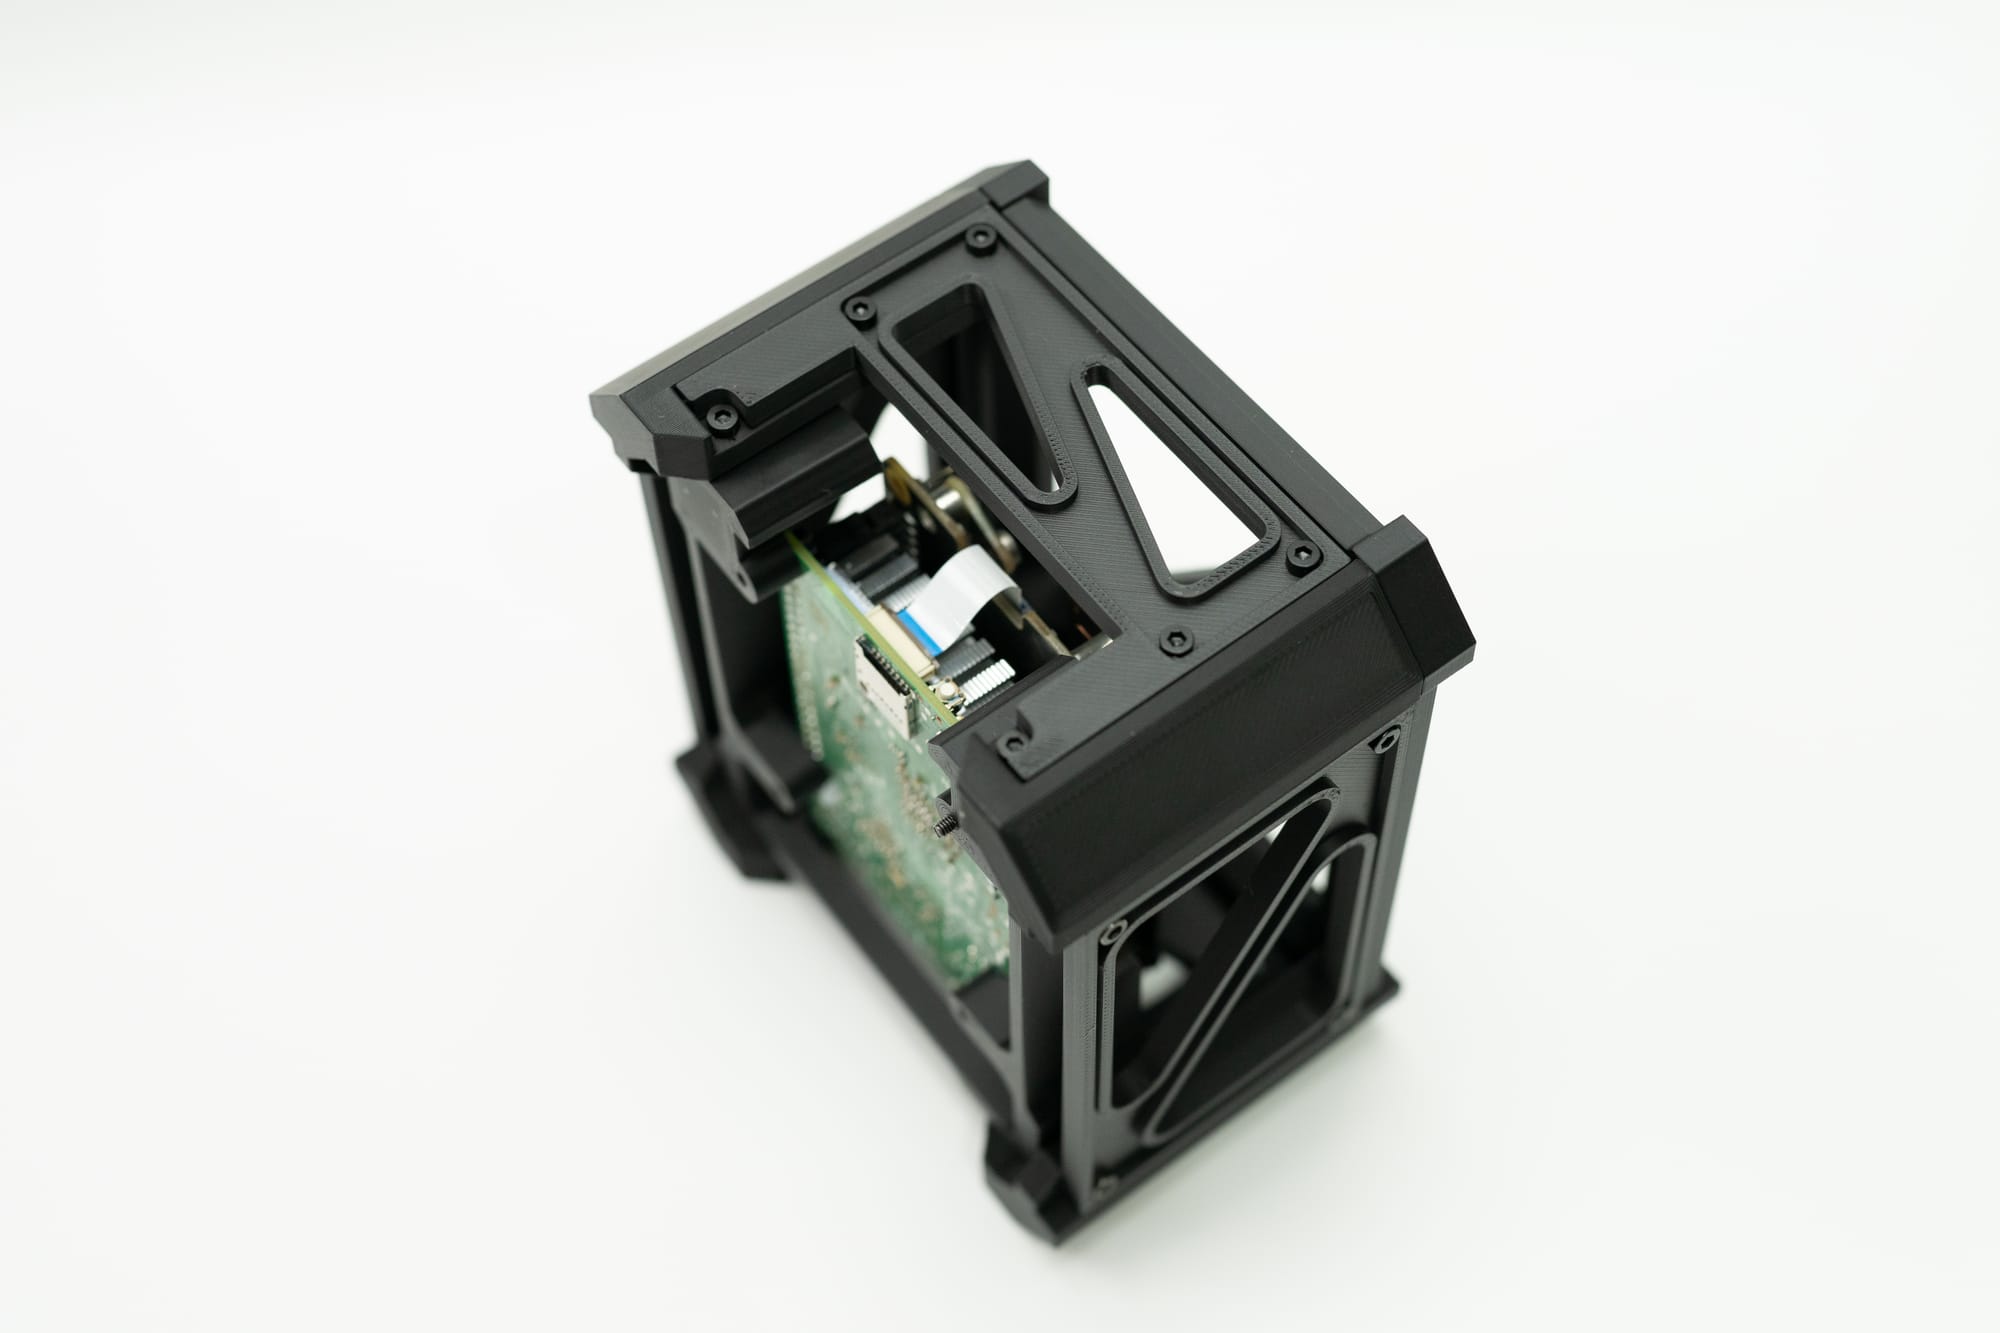
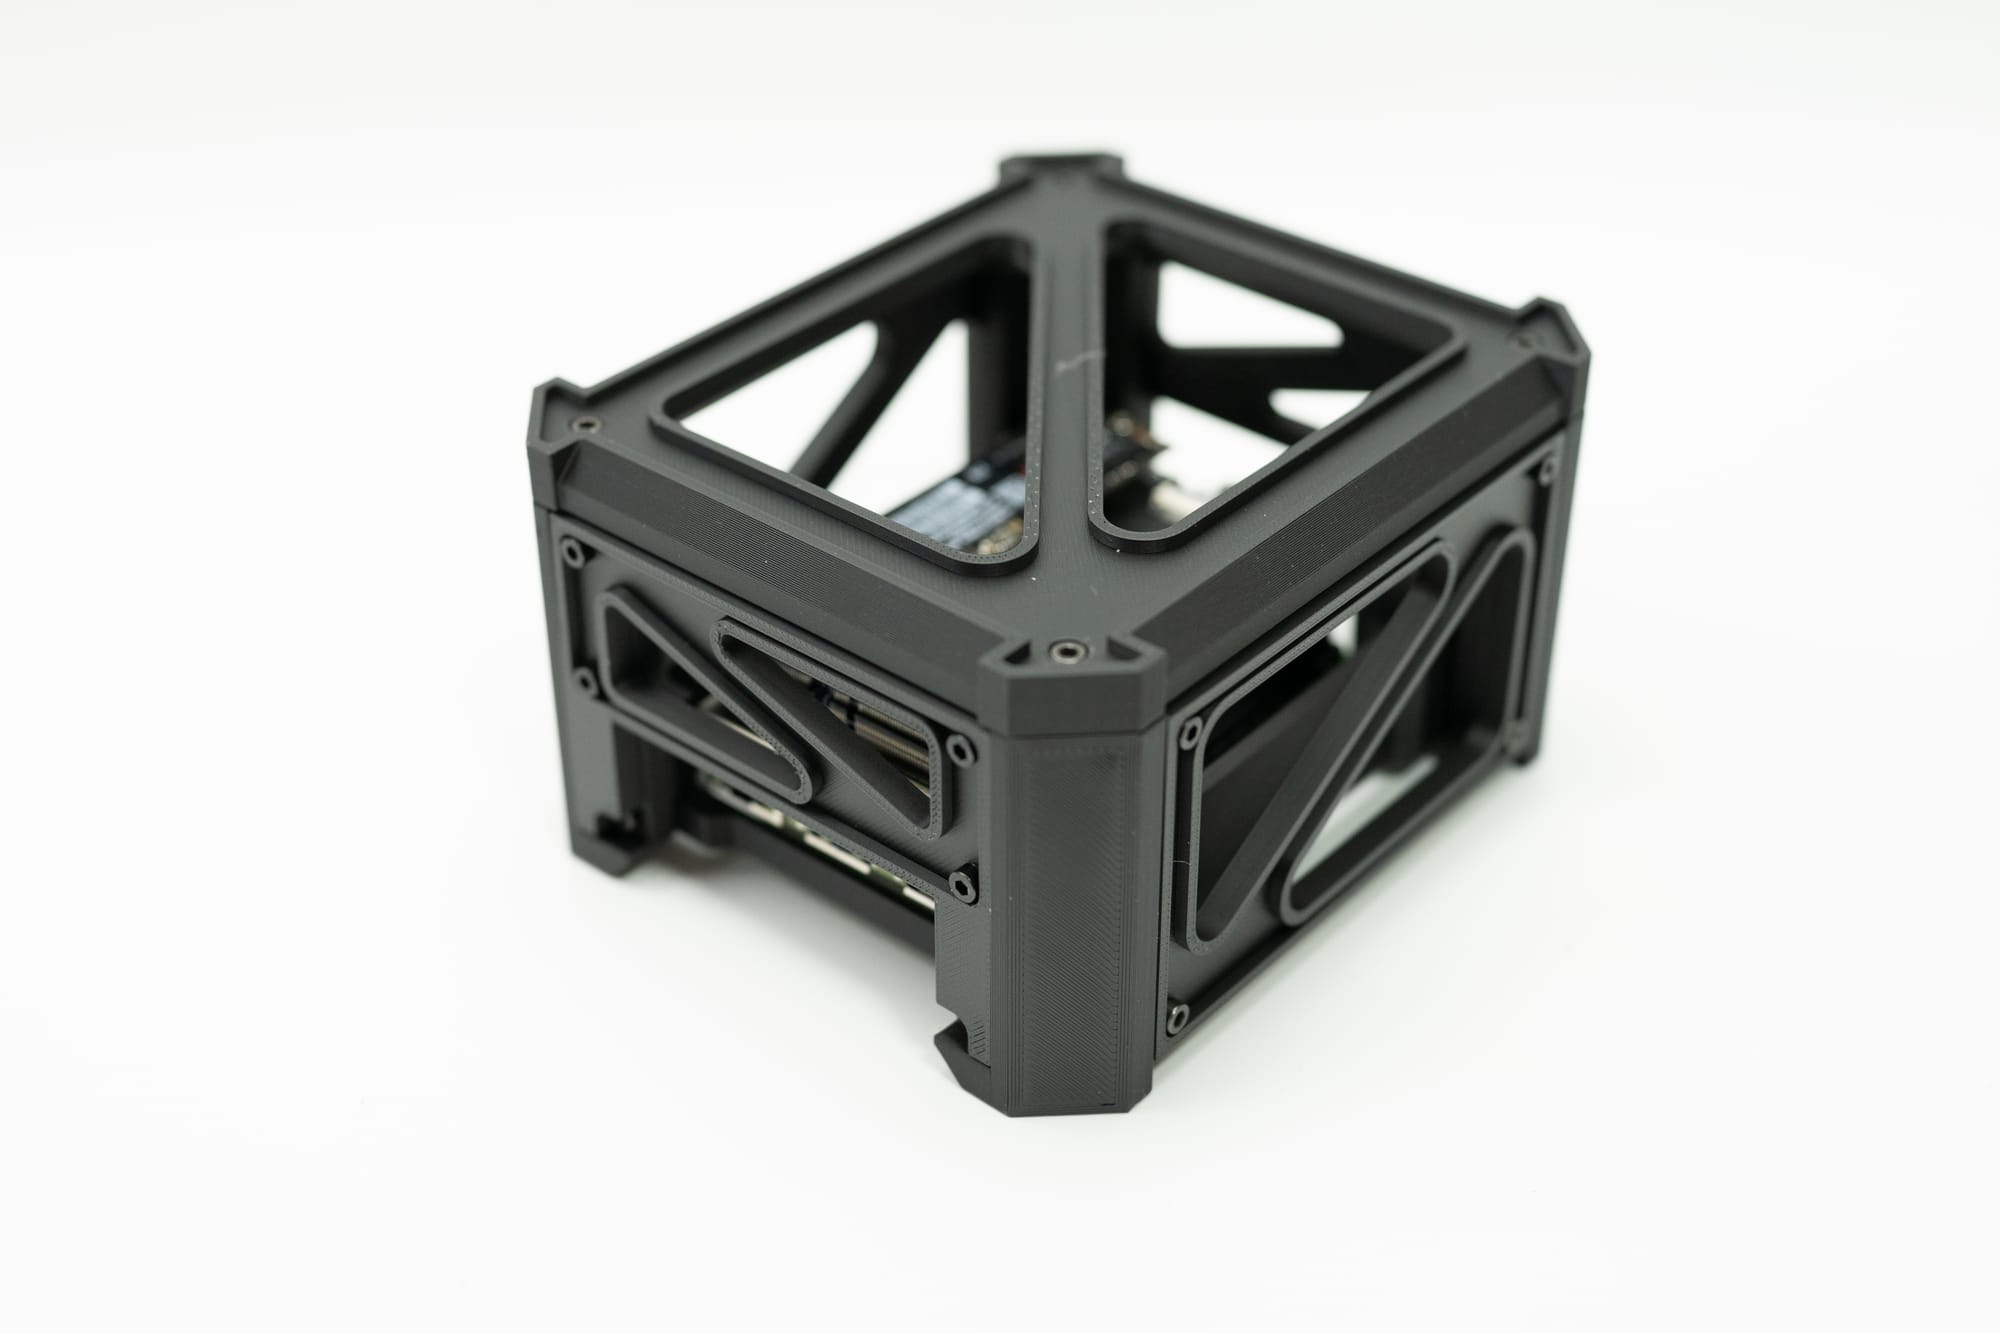
That's where the compute unit comes in. It's a variation I've visited a few times before for making sure I get good airflow around things like network switches, but this time I wanted something that would just look cool and give the same airflow benefits. So the concept is pretty simple, keep the screw count and part inventory to a minimum, make it easy to print, and easy to swap out or modify specific parts so people can hack this as easy as possible.

This means four corners that are largely identical, matching panels on opposite sides, a top with some cool visual details, and a frame to mount the SBC to. I made a version for the IOTA and for the Raspberry Pi 5, but the Pi5 won't live on my desk- the fan is too noticeable to keep it there. There's just enough room for the IOTA's heatsink with no fan, and plenty of room for the Pi5 plus multiple hats. Want to add a screen to the Pi5? Add holes to raise the Pi5 up a bit and make a new top plate to match the screen. Want to stack two Pi5's? Two Pi3's or Pi4's? there's room for that too.
If you'd like to print this yourself, you can purchase a membership and get the files to download right away, along with all of my other builds. If you don't have a printer and want to purchase prints from me, the link to purchase this is here, as well as the button below. All prints are in matte black or matte white, make sure you pick the color you want.
Raspberry Pi Edition Plastic Parts - Matte Black - Purchase Link
IOTA Edition Plastic Parts - Matte Black - Purchase Link
Raspberry Pi Edition Plastic Parts - Matte White - Purchase Link
IOTA Edition Plastic Parts - Matte White - Purchase Link
The parts list is simple too:
- For the M2.5 Screws from Amazon, you can use this kit - Amazon
For the individual screw usage, see below along with the McMaster Carr links:
- M2.5 x 8mm for the Raspberry Pi mounts and most of the case - McMcaster Carr
- M2.5 x 12mm for the deeper holes mounting the side panels to the SBC plate - McMaster Carr
For the M3 screws, use this kit from Amazon, or the links below to McMaster Carr. The M3 screws are only needed for the IOTA board, not the Pi. The Pi uses M2.5 screws exclusively. - M3 Kit - Amazon
- M3 x 8mm for mounting the IOTA board to the SBC plate - McMaster Carr
- M3 x 5mm for mounting the m.2 PCB to the SBC plate (underneath, a 4mm should also be fine here from the kit) - McMaster Carr
- Matte Black PLA - Amazon or Bambu Lab
Then pick your board- DFRobot has a number of options like power adapters, ?NVME, and wifi for the IOTA board, and Amazon is not the only place to get a Pi5. This project works with the Pi4 as well, but NVME only works with the Pi5.
- N150 Latte Panda IOTA - DFRobot
- N150 Latte Panda IOTA Heatsink - DFRobot
- Raspberry Pi 5- Amazon
- Raspberry Pi 5 NVME adapter - Amazon
For either setup you will want a high current power adapter. The DFRobot shop sells a high current power brick for the IOTA, but for the Pi5 with NVME drives I recommend something like this laptop charger. In my experience the Pi5/NVME combo doesn't work with any USB adapters or panel mounts, and the Pi5 setup must be wired directly to the USB C charger.
- 130W USB Power Adapter - Amazon


Comments ()