the Raspberry Pi CLUSTER deck

Over the past year I’ve really focused on the idea of the Cyberdeck- while I’m one of many different makers in the space, I always had an industrial and retro-futuristic approach to the builds.
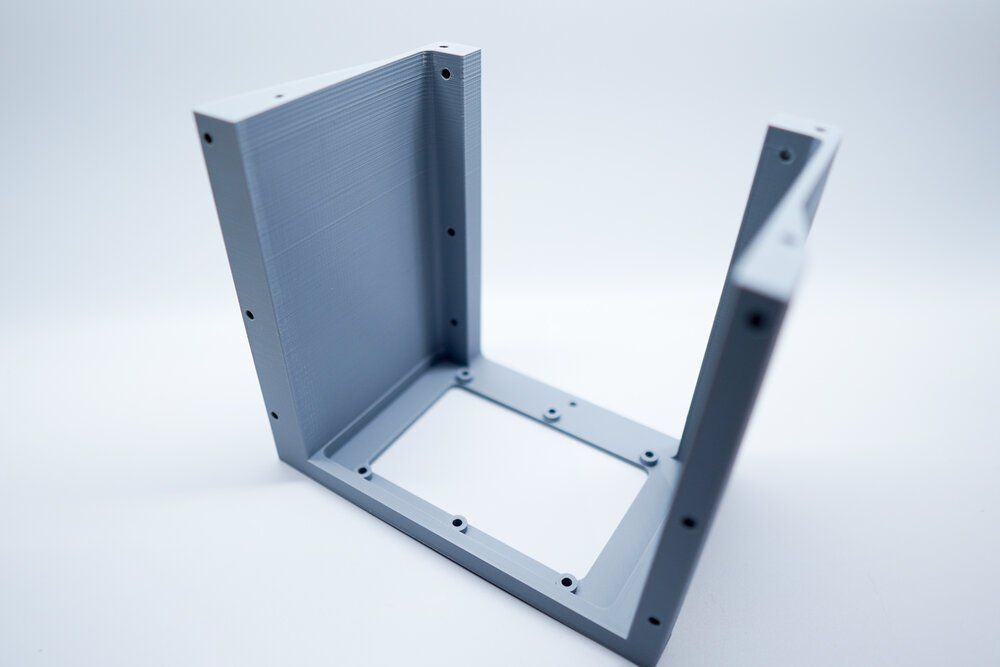
This project uses fewer parts than the Mil-Plastic deck, but is a little harder to print. The largest part takes more than 20 hours to print on some printers.
The core of the build is the following build list:
A Raspberry Pi 4 2GB (node 1) with the following attached:
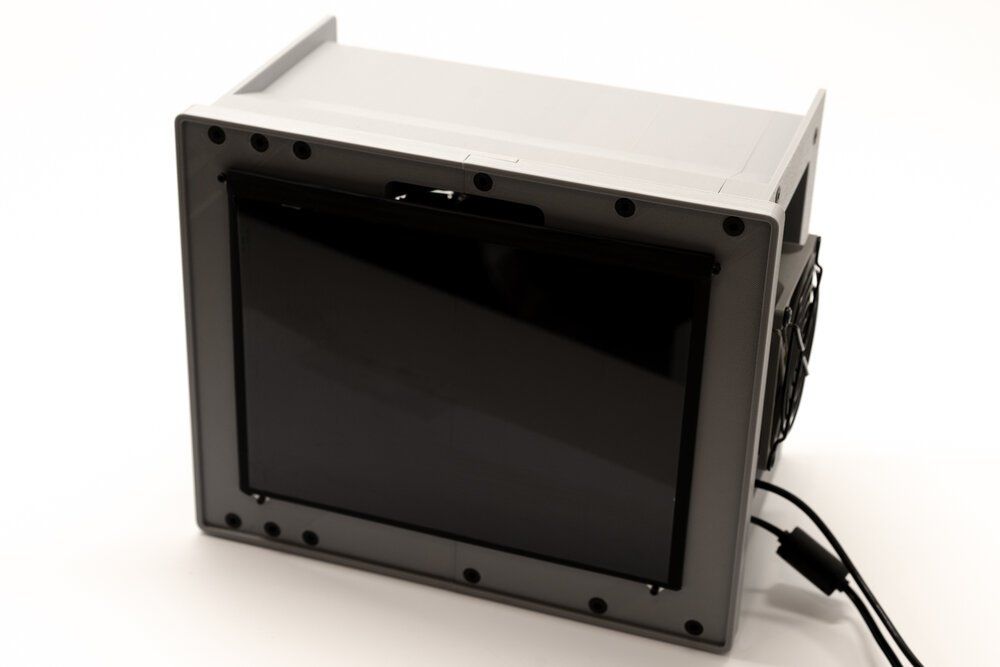
- Pimoroni 10” HDMI Display - Adafruit
- Micro HDMI to HDMI connector - Amazon or Amazon
- USB to NVME Adapter - Amazon
- M.2 Drive - Amazon
- Raspberry Pi PoE Hat for power and CPU cooling - Amazon
- Short Ethernet patch cable - Amazon
A Raspberry Pi 4 2GB (node 2)
- Connected to the PoE switch (Ethernet cables linked above)
- Purple LED connected to the USB port - Amazon
Raspberry Pi 4 2GB (node 3)
- Connected to the PoE switch (Ethernet cables linked above)
- USB to fan controller
Raspberry Pi 4 2GB (node 4)
- Connected to the PoE switch (Ethernet cables linked above)
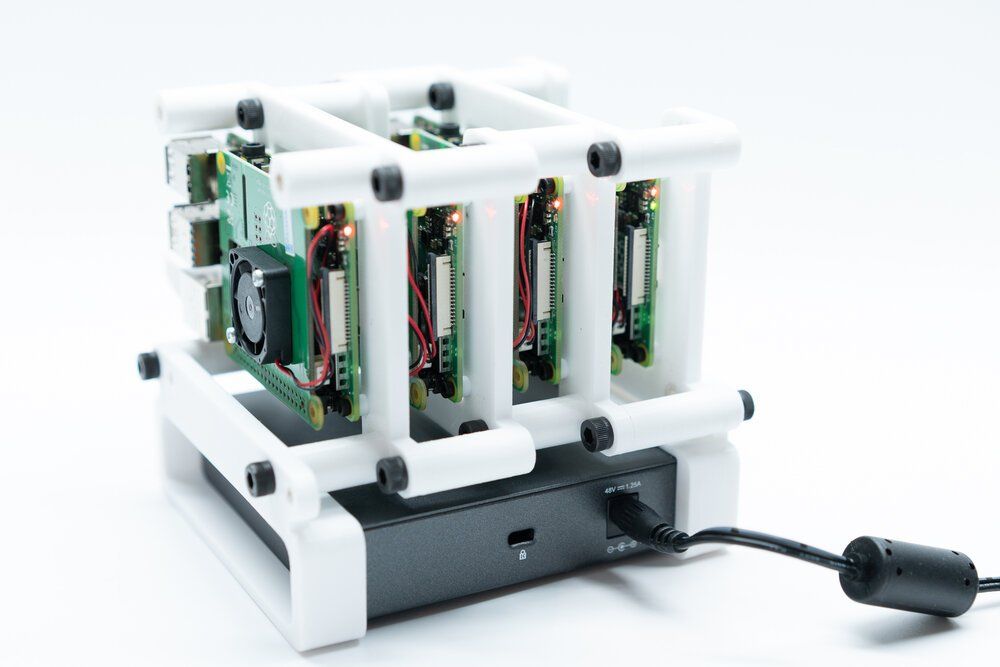
- Each Pi 4 is connected to the 5 Port PoE switch - Amazon
- The enclosure uses two Noctua fans - Amazon
- Fan grills - Amazon
- M5 Screws - McMaster Carr
- High endurance MicroSD cards - Amazon
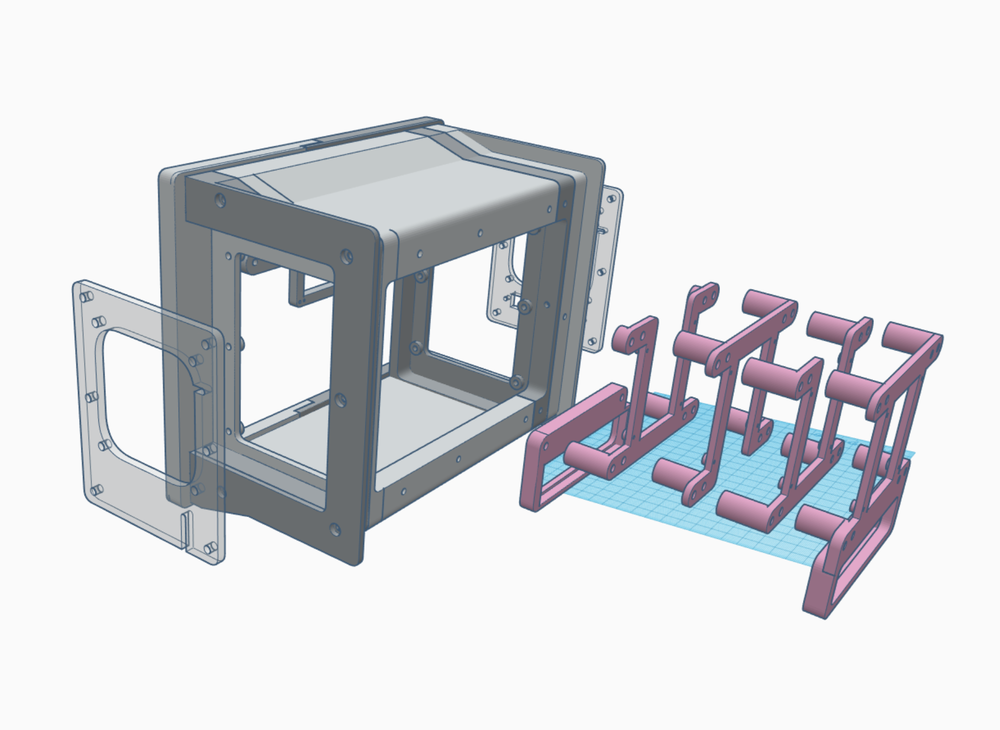
- Assembled 3D Model (use this for assembly instructions) - Tinkercad
- Parts layout for printing (use this for orienting the parts, 2 need supports) - Tinkercad
- Parts on Thingiverse
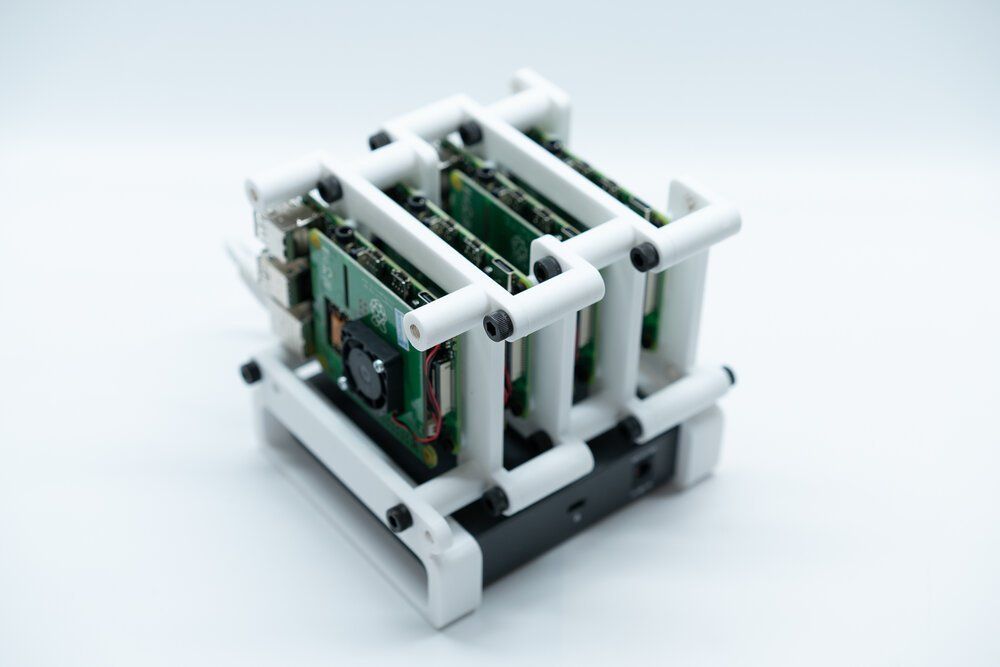
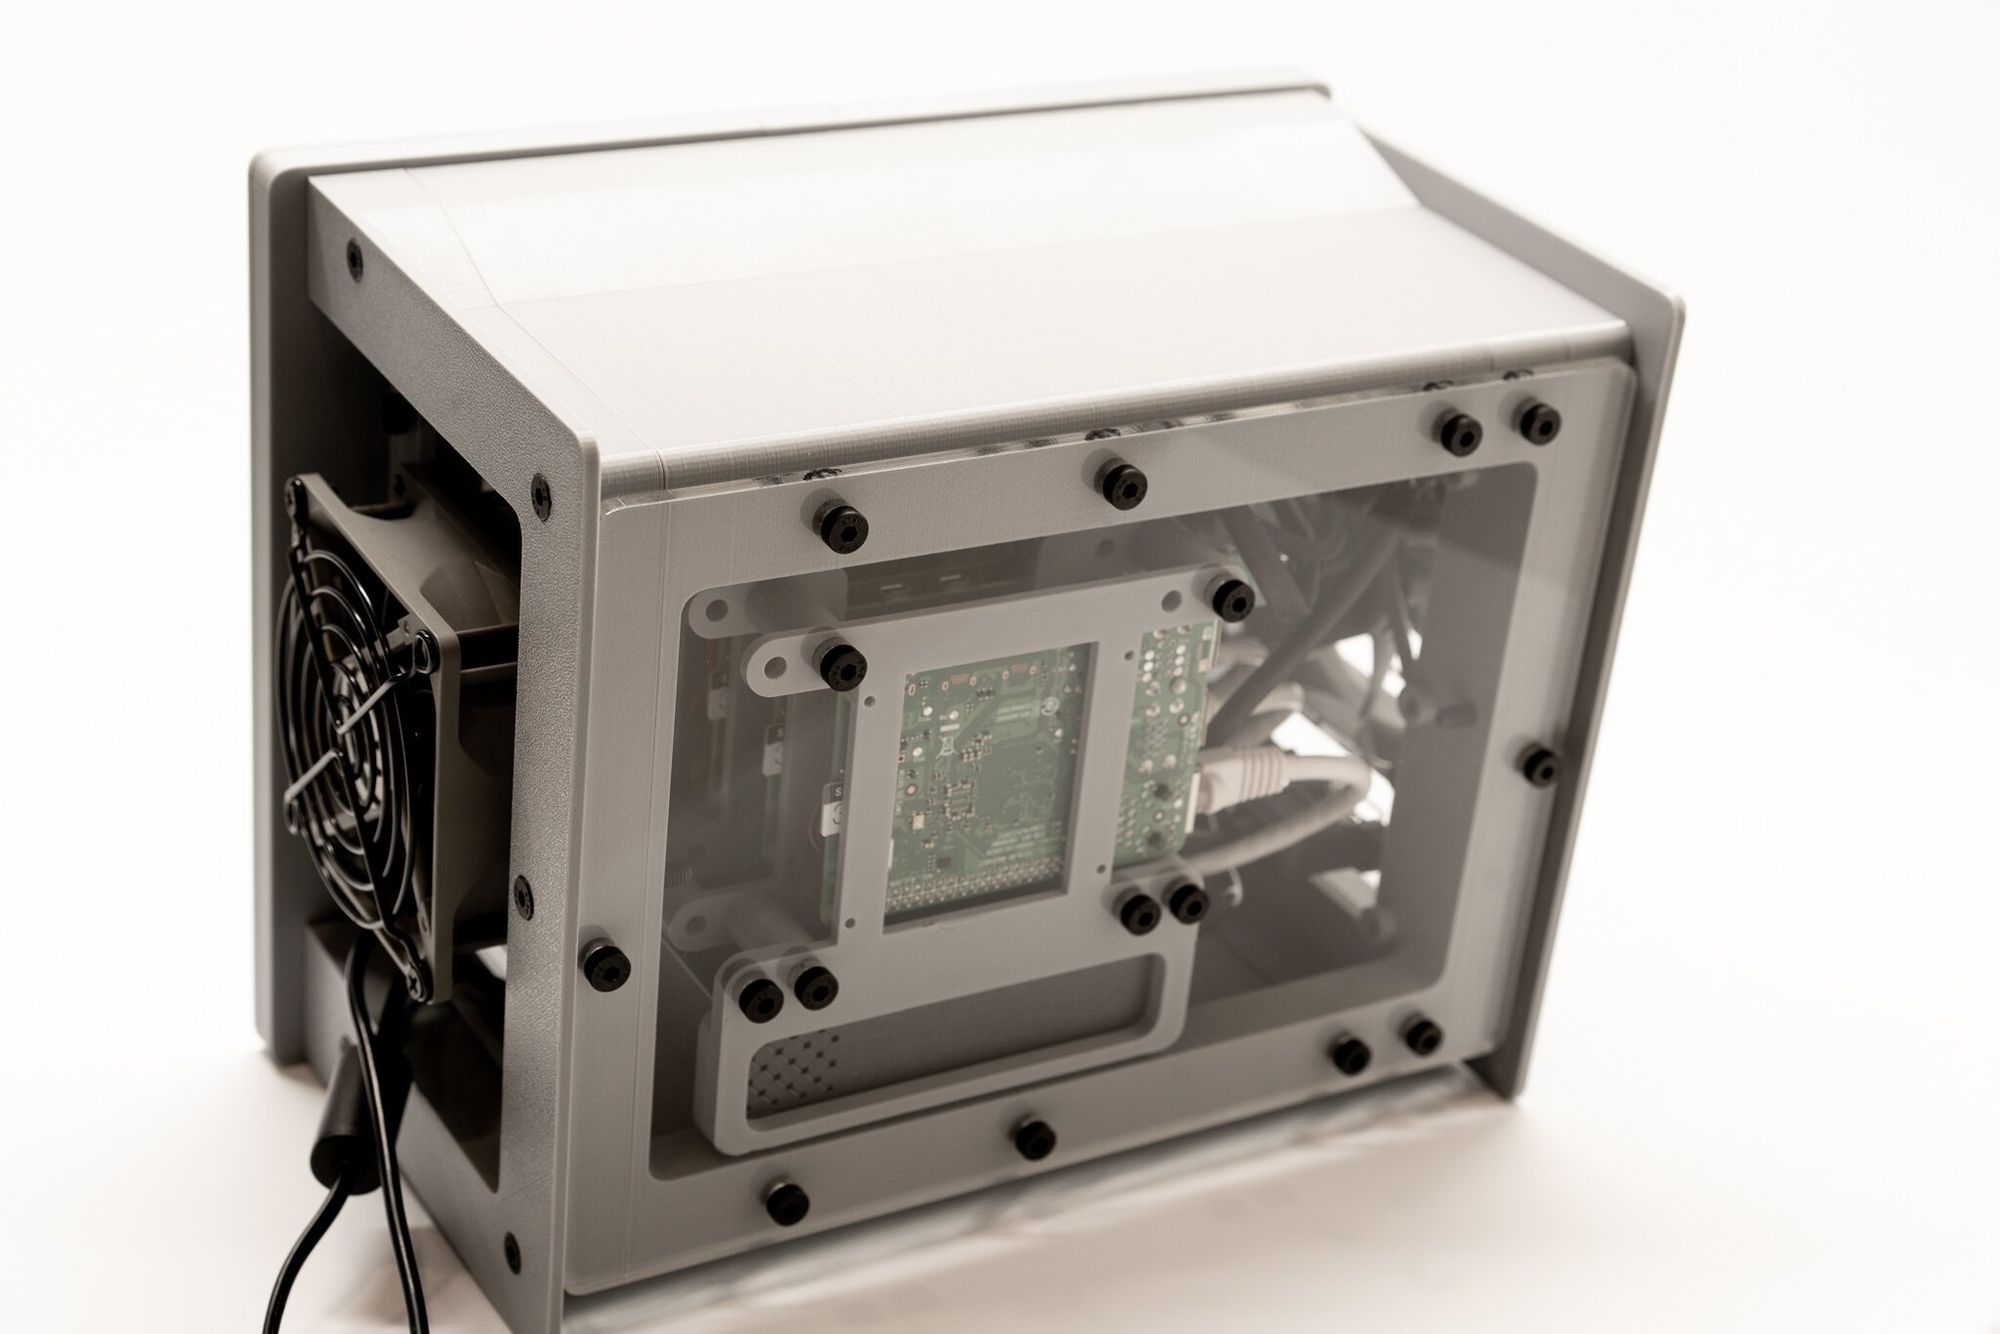
The idea from there is simply to put it all inside the enclosure- but how do we make it all fit? First, I came up with the idea of alternating bolts to make large stacks of Pis. After some experimentation it was clear that too many Pis stacked this close together created thermal issues, so I knew I’d need to add some serious cooling. Here’s one of the prototype setups- the core of this is identical in the Cluster Deck, so you can just print this if you’re on a budget. It’s a pretty tidy desktop setup too since only the switch needs power.
From there it was all about mounting the boards in a way that made sense- I wanted to make sure they had ample cooling so I arranged the boards to allow airflow from left to right to pass over them.
The cluster mounts to a back panel, which in this case is a clear plastic sheet laser cut from the folks at Ponoko.com.
I won’t go too much into the case since it’s very similar to the Mil-Plastic deck, but this one has a really large plastic shell that prints are one part. The rest still screws together with M5 screws.
This project is very much a work-in-progress and has some details I’d like to improve in the future:
- The design lacks good fan speed control, so the fans on each side are running at full speed. They’re not loud, but they are not silent either. I think I’d prefer a more open case with quieter fans, but getting good fan speed control without fancy IO is a challenge (see #2).
- The Raspberry Pi PoE Hat is a good product, and really turns the Pi4 into only a computer- it doesn’t really need to use all the pins on the board, but like many Pi Hats it takes and blocks all of them. With the boards so close to each other, the PoE hat is both necessary for power and cooling, but also prevents clever stuff like fan speed control or other IO which is normally pretty easy on the Pi.
- The display is fine for standard light use, but the mounting is pretty finnicky and I’d prefer a more robust mounting solution. That said, once it’s properly in place it works fine.
- Finally, I thought I’d like the grey but the case needs more detail. If you don’t need something sci-fi looking on your desk, just the bare internal bracket of Pis is pretty cool.

Comments ()