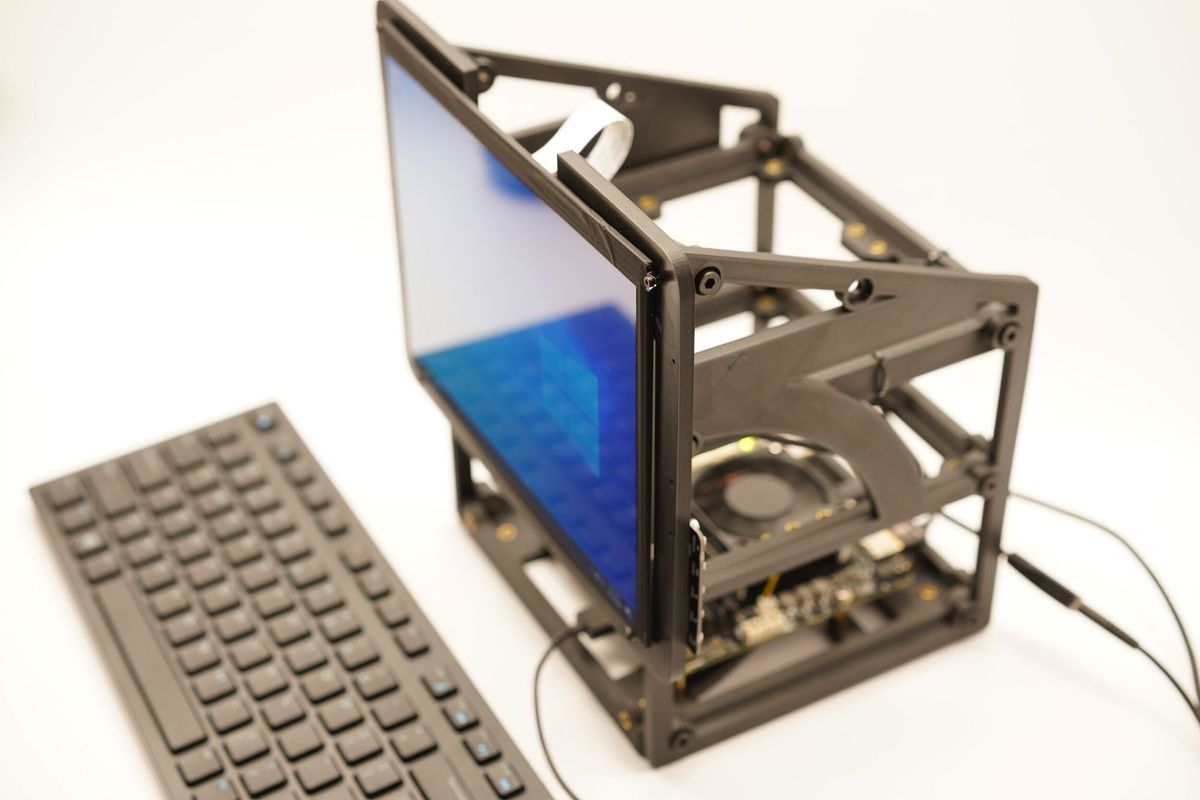
the OPEN frame computer
The term PC is often a bit of a loaded term- Apple frequently markets their machines as PC replacements while sealing off and removing port after port. Distant in the rear view mirror are the days when the homebrew computer market spawned many companies that grew and displaced the giants of that era.
The original Mac was always a profile I found interesting, but growing up with mainframe terminals and PCs, I wondered where the ports and expansion slots were. Sure the ports were there, but they didn’t work with any hardware I saw, even in the computer labs of that time. Still, it’s a cool profile and that influenced this design- but the similarities end there.
We’ve heard the criticisms of Apple products before, and while some are the darlings of tech journalism, recent products seem to rely heavily on a very centralized model. For this project, I am going the other direction. This project is called the “Open Frame” computer, and it’s a pretty direct concept: A design that is modular, one that makes it easy to modify, upgrade, and rewire- but without having to constantly disassemble it. I find I am always using a few components in my workshop again and again:
- An HDMI monitor- the shop doesn’t have space for a monitor on a cart, and the projects are usually just out of reach of a monitor on an arm. The ARM Terminal works for some projects, but that uses a different display connector specific to the Raspberry Pi, and it’s far too low for desktop resolution on a daily basis.
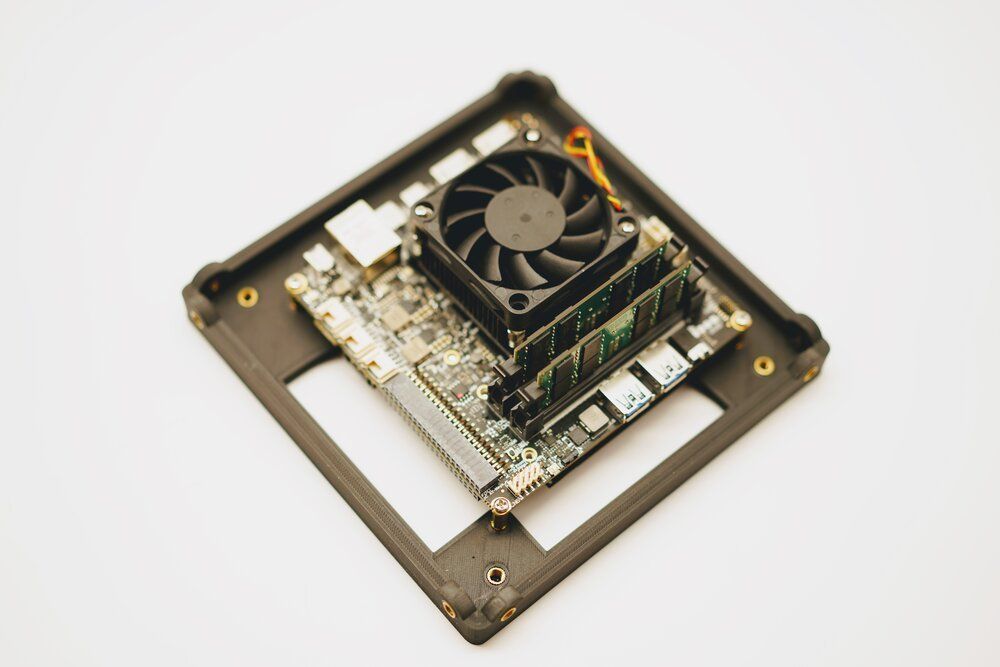
- A PC - Something simple that I can format/re-image again and again, not really a daily driver PC. Instead, think of it like the PC version of a shop truck. For this project it’s the Udoo Bolt. More on that later.
- A small and portable footprint - I need it stable so it won’t get knocked over, and it has to use less space than the Raspberry Pi Recovery Kit, which doesn’t always do well on a desk.
- An open frame that’s easy to add hardware/mounts to for new projects. With 3D printing I am looking to leverage more compute and electronics, and it gets messy quick with loose parts floating around.
This project won’t need much of a build guide- it’s pretty easy to see how it all comes together. Here’s what I ended up using for this project:
- Carbon Fiber PETG filament - I wanted something thin, light, and strong. Having donated the rest of my PETG, this was still in stock so I was lucky- but it’s expensive. Bonus points for the matte black look on the printed parts.
- Pimoroni 10” HDMI Display - This is a great display but it’s pricey- eagle eyed viewers may notice the printed mount also matches a Pelican case insert, so it’s easy to move to other projects with just a few screws.
- Udoo Bolt AMD System - This is a fast system, and easy to mount with an M.2 drive making it an easy desktop replacement board- but the fan is cheap and loud, something I still plan on doing something about- it’s a real shame a board like this still has a loud fan months after release and a beta firmware still working its way to release.
- A short HDMI cable (Amazon)
- Micro USB for power - both a small extension cable tied to the frame, and a reliable wall adapter.
- Any keyboard I have laying around
- All the 3D parts are available here (Tinkercad)
Rather than step through a build guide, let me walk you through each component and what I have in mind for it- all while keeping the project as flexible as possible for future projects.
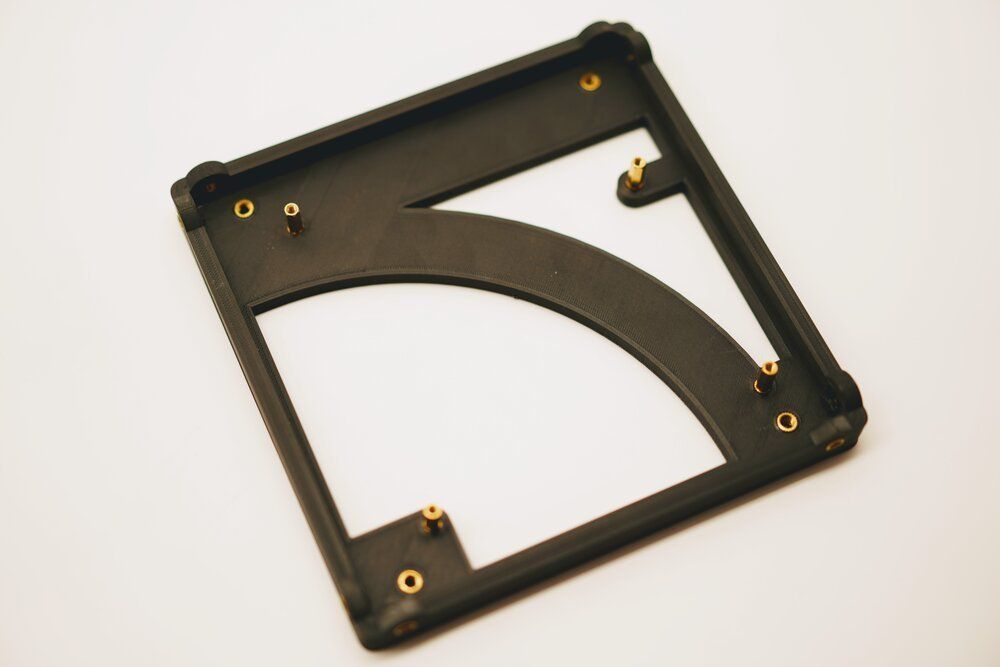
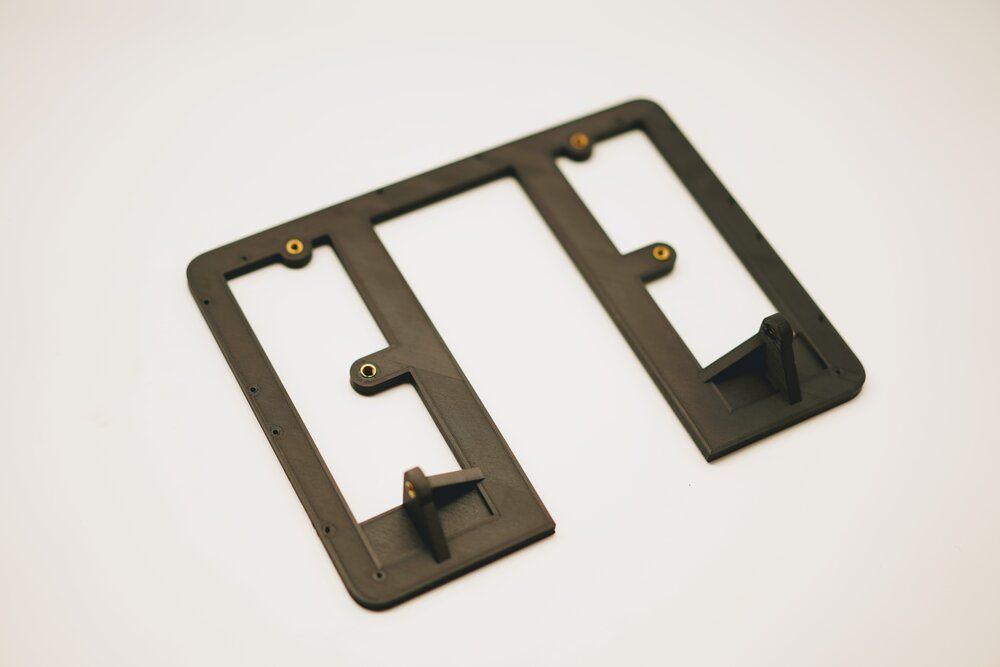
Base Frame
This part is pretty straightforward- it’s the base for a compute board. You could easily modify the design to hold a Raspberry Pi, or other boards. It’s a little bit small for a Mini-ITX though. I needed some bracing in the file and loved the way the back7 logo came out, but it gets covered by the board.
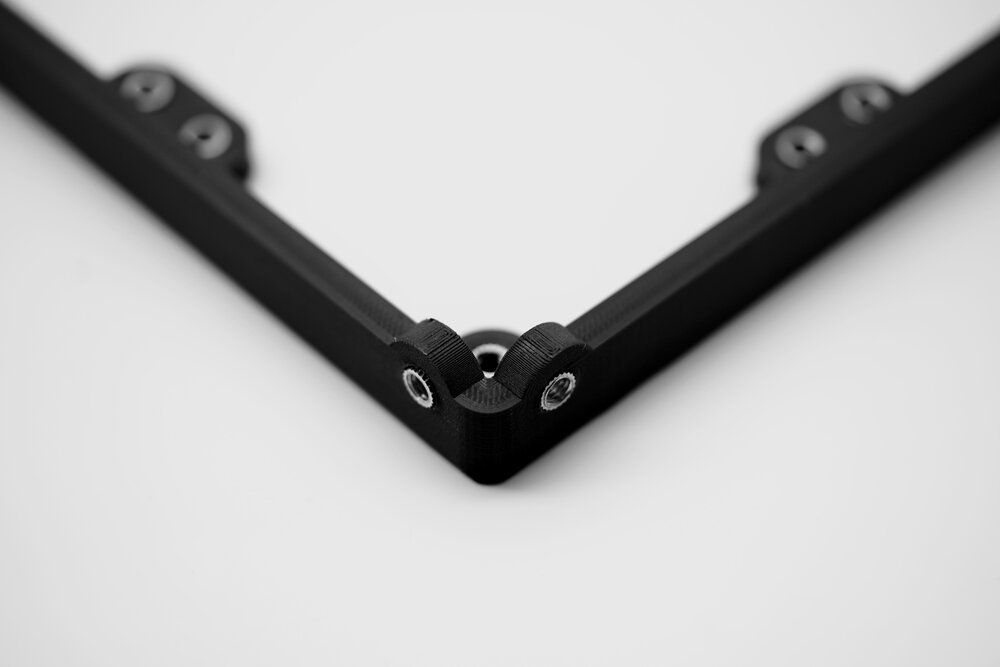
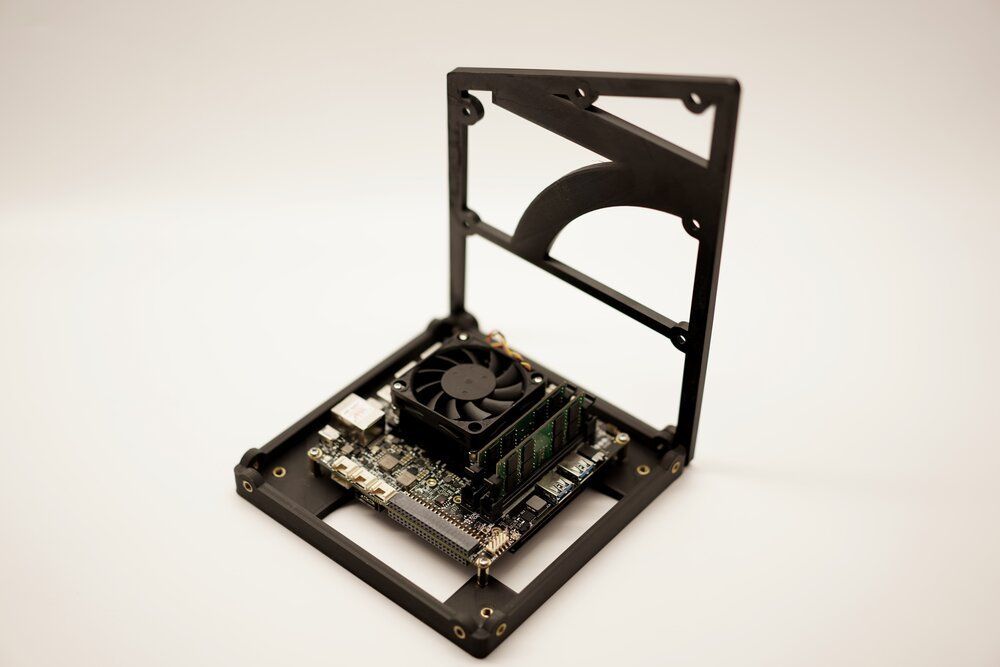
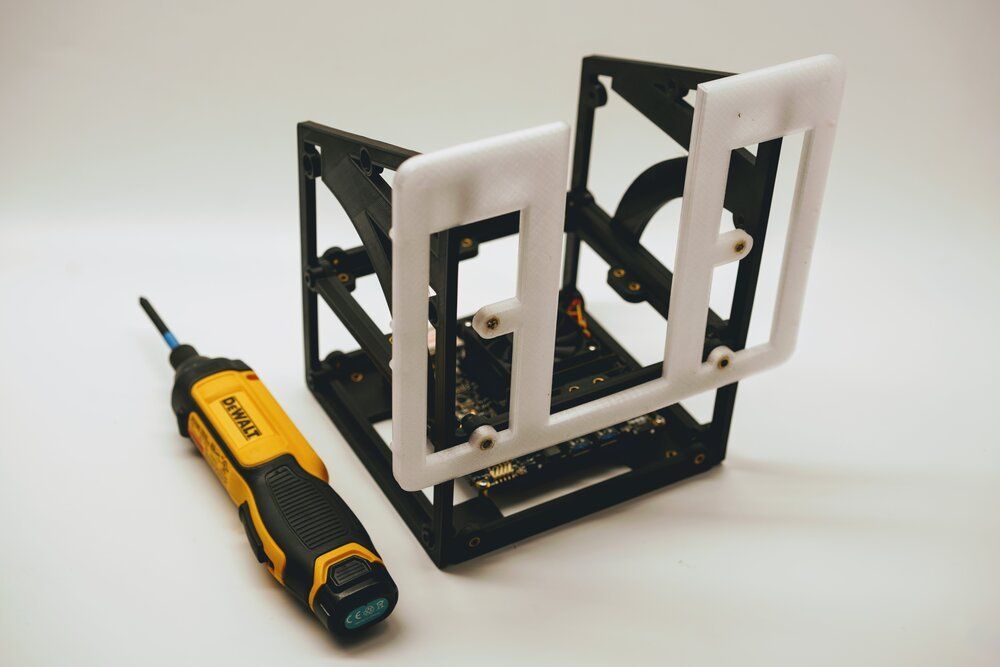
Side Panels
I wanted the sides to have a similar profile to the original Mac, but with an open design to allow for cables to freely run in/out of it. Here’s one of the side panels installed. You’ll note there’s no threaded inserts in these- the internal frame parts have the inserts, keeping this matte black on the sides.
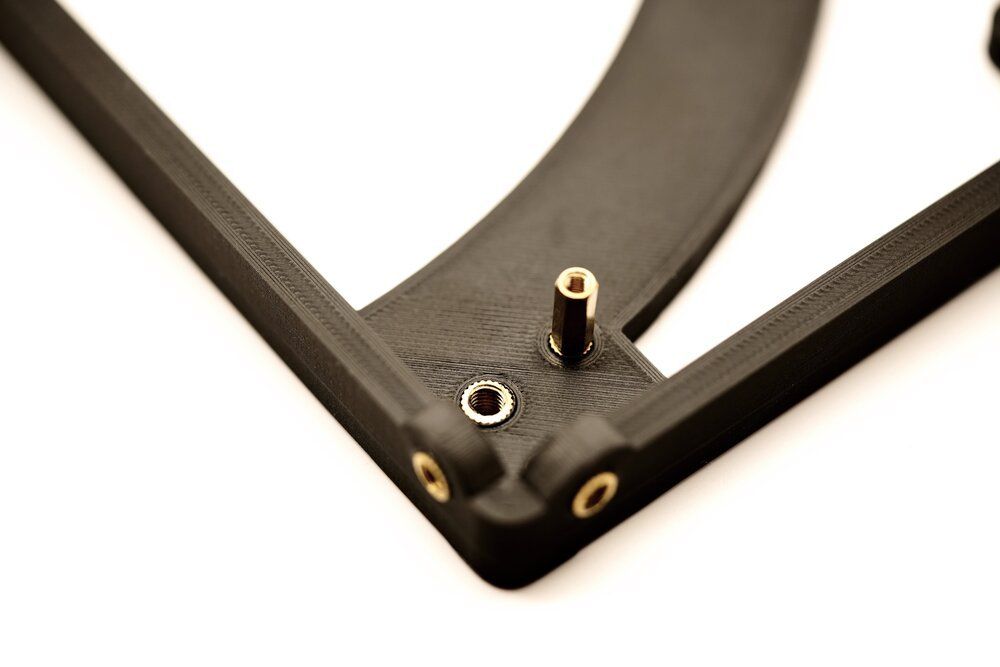
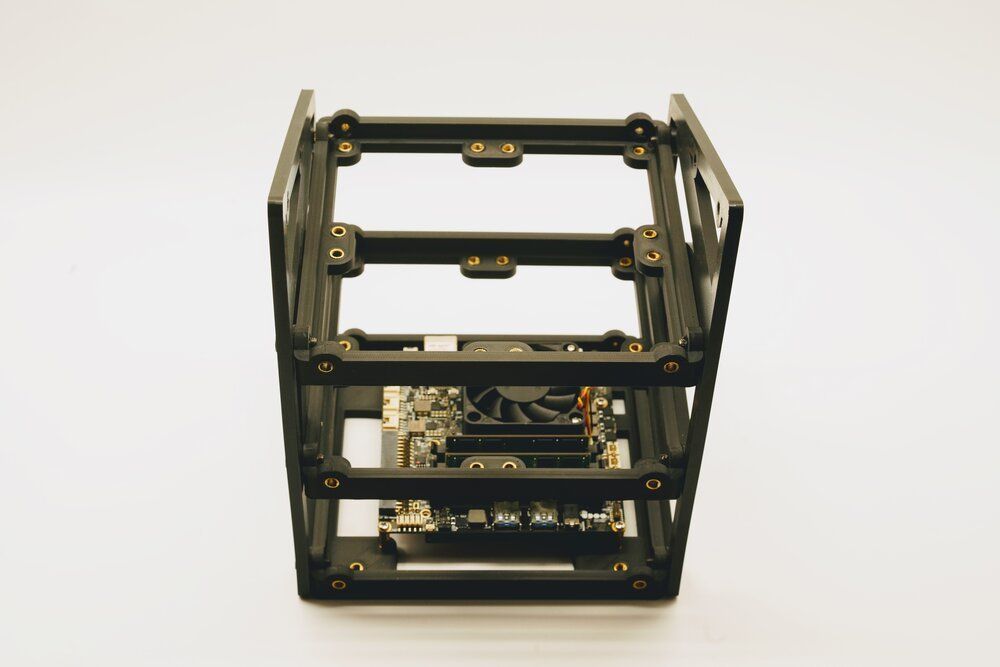
Center Frame
The real star of the build is the center frame though- with tons of tabs, this is designed to hold just about anything you may have a need for on projects- batteries, external circuits, etc. I would recommend not putting the batteries above such a warm CPU fan, but it’s easy just to swap the positions.
Display Bracket
Finally on the assembly process is the display- it’s a Pimoroni 10” HDMI display. It’s bright and clear, and easy to use. Here’s a slideshow that includes some prototypes- eagle-eyed viewers will also notice that the outline on the display frame also matches the Pelican 1200 series case… another project maybe?
One of the questions that seems to come up on these projects (specifically from Reddit) is, “yeah, but what does it do?” This project should do just about any general task, not need a 3rd party repair shop, easily hackable, modifiable, and whatever I need it to be. The Mac profile may not last long, but it’s easy to swap those parts out.
Thanks for reading! I hope you find this project inspiring to build your own- the materials I used are here (the components are at the top of the article). I have been really inspired by Cory Doctorow’s work, specifically in Walkaway, but you can also read more about general purpose computing here at The Verge.
- M5 Threaded Inserts (Amazon)
- M3 Threaded Inserts (Amazon)
- Carbon Fiber PETG (Matterhackers)

Comments ()