Quick Kit 2024 Editions & Concepts
As we approach the end of 2023, there are a few important updates to cover:
- Design Models Availability: The design models featured here are not available for free. They can be purchased as prints in various colors or as digital STL files. You can find them on shop.doscher.com.
- STL File Pricing: The digital STL files are priced at just $3 each.
- Subscription Option: Alternatively, you have the option to subscribe to a paid tier on doscher.com. Paid subscribers gain access to all the design files as part of their membership.
- No DRM of Course: It's worth noting that there is no digital rights management (DRM) on these files. This is obvious for people experienced in 3D printing, but worth mentioning anyone that hasn't gotten into the hobby yet. The designs are released under the Creative Commons Non-Commercial license, which means you may encounter modifications of them on popular 3D printing websites. This is encouraged and welcomed.
- Supporting the Projects: The nominal fee for the design files plays a crucial role in funding these projects. While the author is passionate about the hardware they select, these projects receive no sponsorships, special treatment, paid placements, or "gifts with no strings attached" situations.
Feel free to explore and enjoy these designs while knowing your support contributes to their continued development.
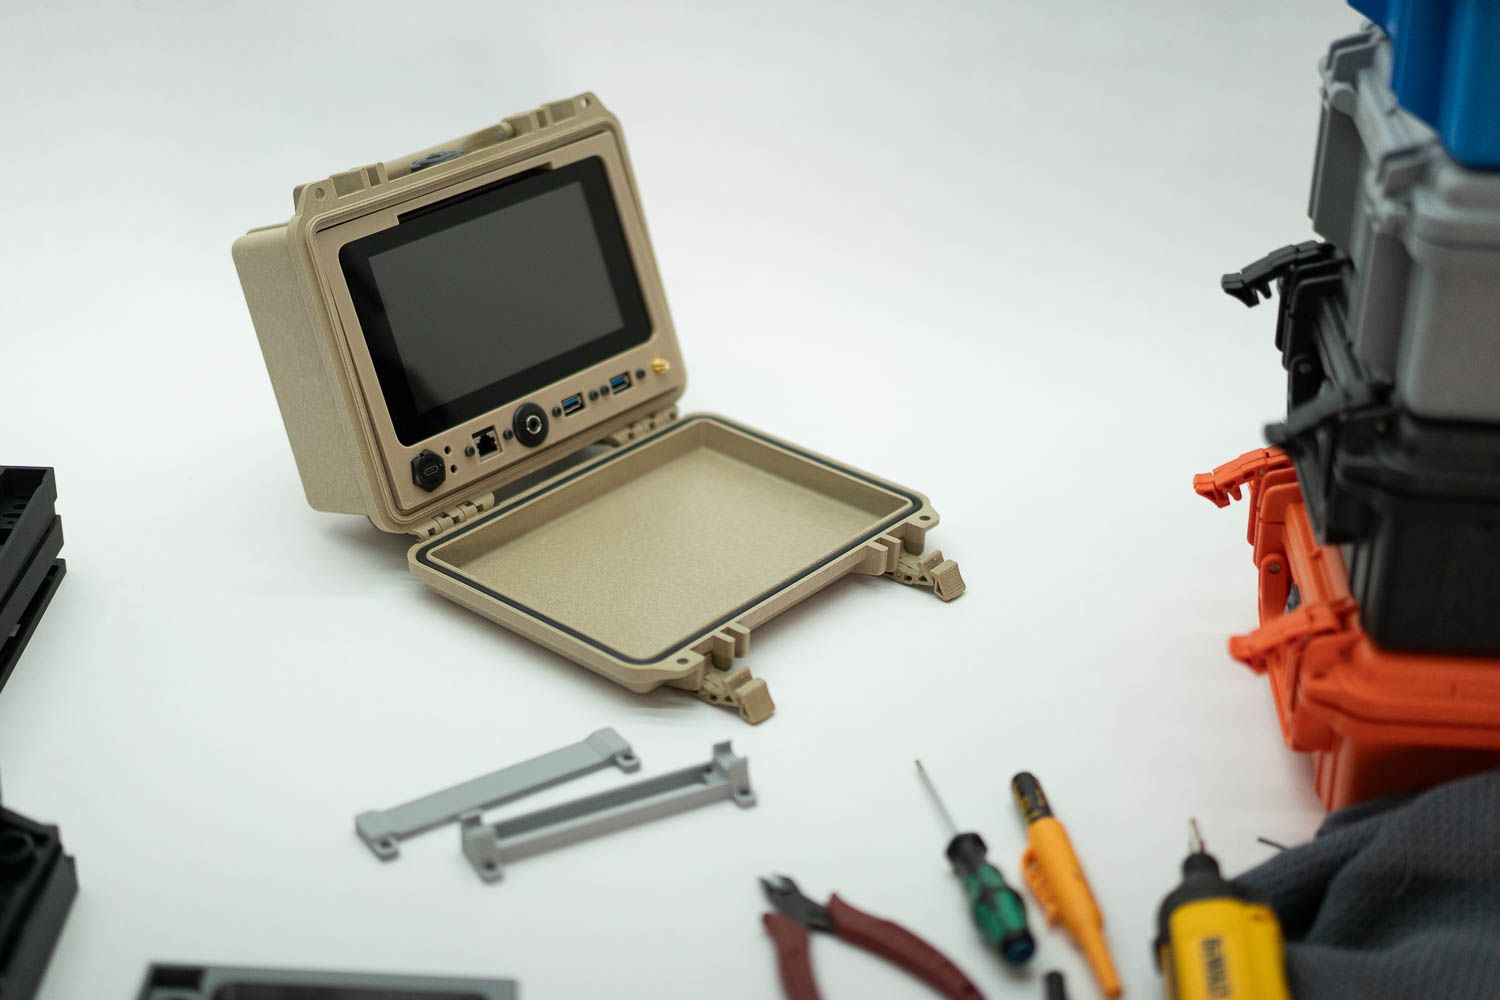
I've taken design feedback seriously, and one thing was crystal clear: some users wanted different ports, others needed compatibility with smaller 3D printers, and, most importantly, many found the assembly process a bit too complex. I'm thrilled to announce that this article now comes with a step-by-step assembly guide, making things easier than ever.
You have two options: you can purchase the required parts from me, or you can download and 3D print them yourself. The assembly process has been streamlined significantly. The Quick Kit's frame has been simplified to a single component, making it a breeze to attach the screen, the Raspberry Pi, and the ports.
Let's keep our fingers crossed that we won't experience the same delays we saw with the Pi4 when transitioning to the Pi5. The Pi5 should be a straightforward drop-in replacement, simplifying your upgrade experience.
One of the significant challenges I've encountered is establishing a sustainable way to share my work. By sustainability, I don't just mean environmentally conscious practices like carbon offsets or recycling plastics. I'm referring to a method that allows me to direct my efforts towards those genuinely interested in the growth of my projects.

I've faced some hurdles, particularly on platforms like /r/3dprinting, where disagreements arose over sharing work without the appropriate licenses. Consequently, anything I posted under my old account remained largely unseen. Similar issues cropped up on /r/cyberdeck, though /r/cybergear proved to be more accommodating. Surprisingly, even a new account created within the past year was flagged as spam by the /r/cyberdeck moderators, even though I hadn't posted anything.
All of this leads me to conclude that Reddit, while excellent for having your work shared by others, isn't an ideal place for individuals to share their own content. Therefore, albeit reluctantly, doscher.com was relaunched this summer to create a more direct means of connecting with people who appreciate my work.
On the website, there's a free tier that allows you to receive my articles via email without any ads. Additionally, there's a paid tier, which grants you access to in-progress builds, and an elite tier where you can engage in discussions and request design modifications. This positive feedback loop will help us make bigger projects, and I have a big one underway right now. It also helps me spend extra time on projects to make kits like the Quick Kit easier to make.
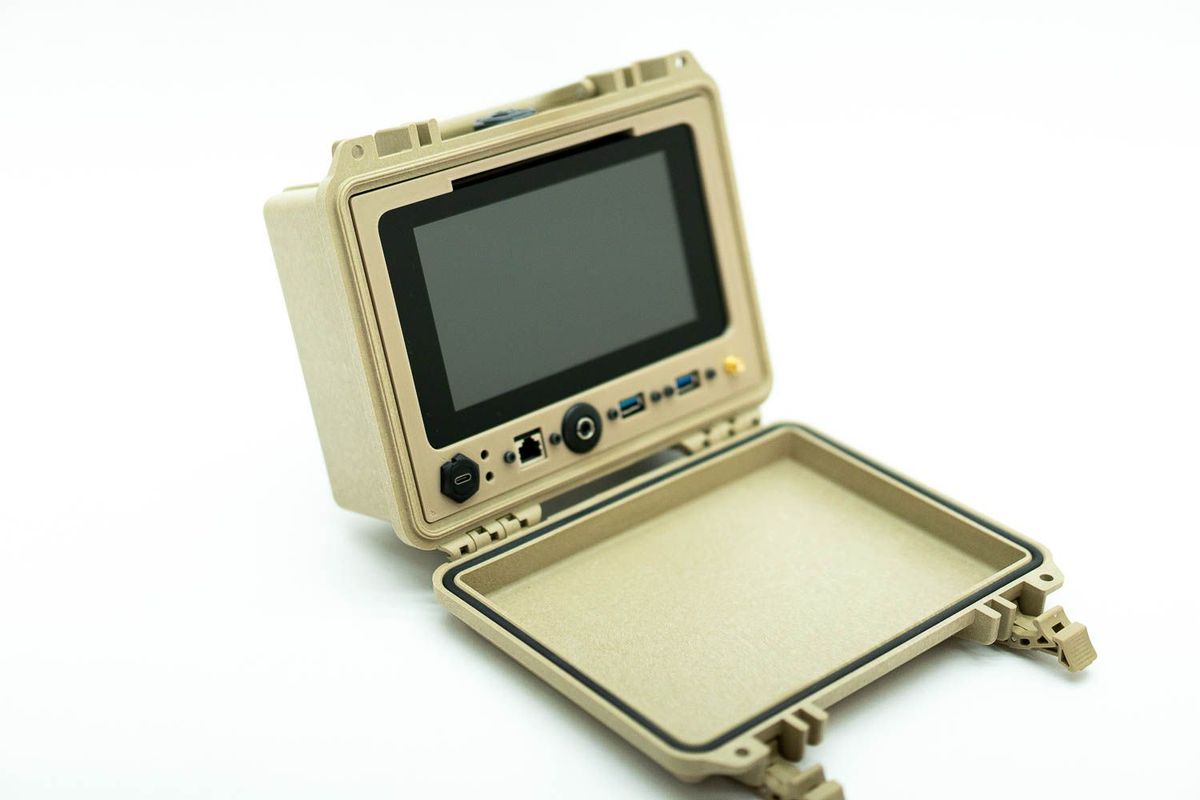
You can find the old design of the Quick Kit here, but the new version introduces several important changes tailored to those interested in using it as a playback device or a Software Defined Radio (SDR) terminal. These key modifications include:
- Fewer Front USB Ports: We've reduced the number of front USB ports to two, which should be more than sufficient. With an additional two available internally, many users have found that using a USB hub or a wireless keyboard covers their needs.
- Headphone Jack Integration: Based on observations from the past two years of modifications, we've incorporated a headphone jack into this design. The best part? No soldering is required, making it user-friendly.
- Streamlined Display Mounts: The tabs for mounting the display are now integrated into the frame itself, eliminating the need for four extra screws during assembly. This not only makes the assembly process much easier but also simplifies 3D printing, reducing costs for both me and those who prefer DIY printing.
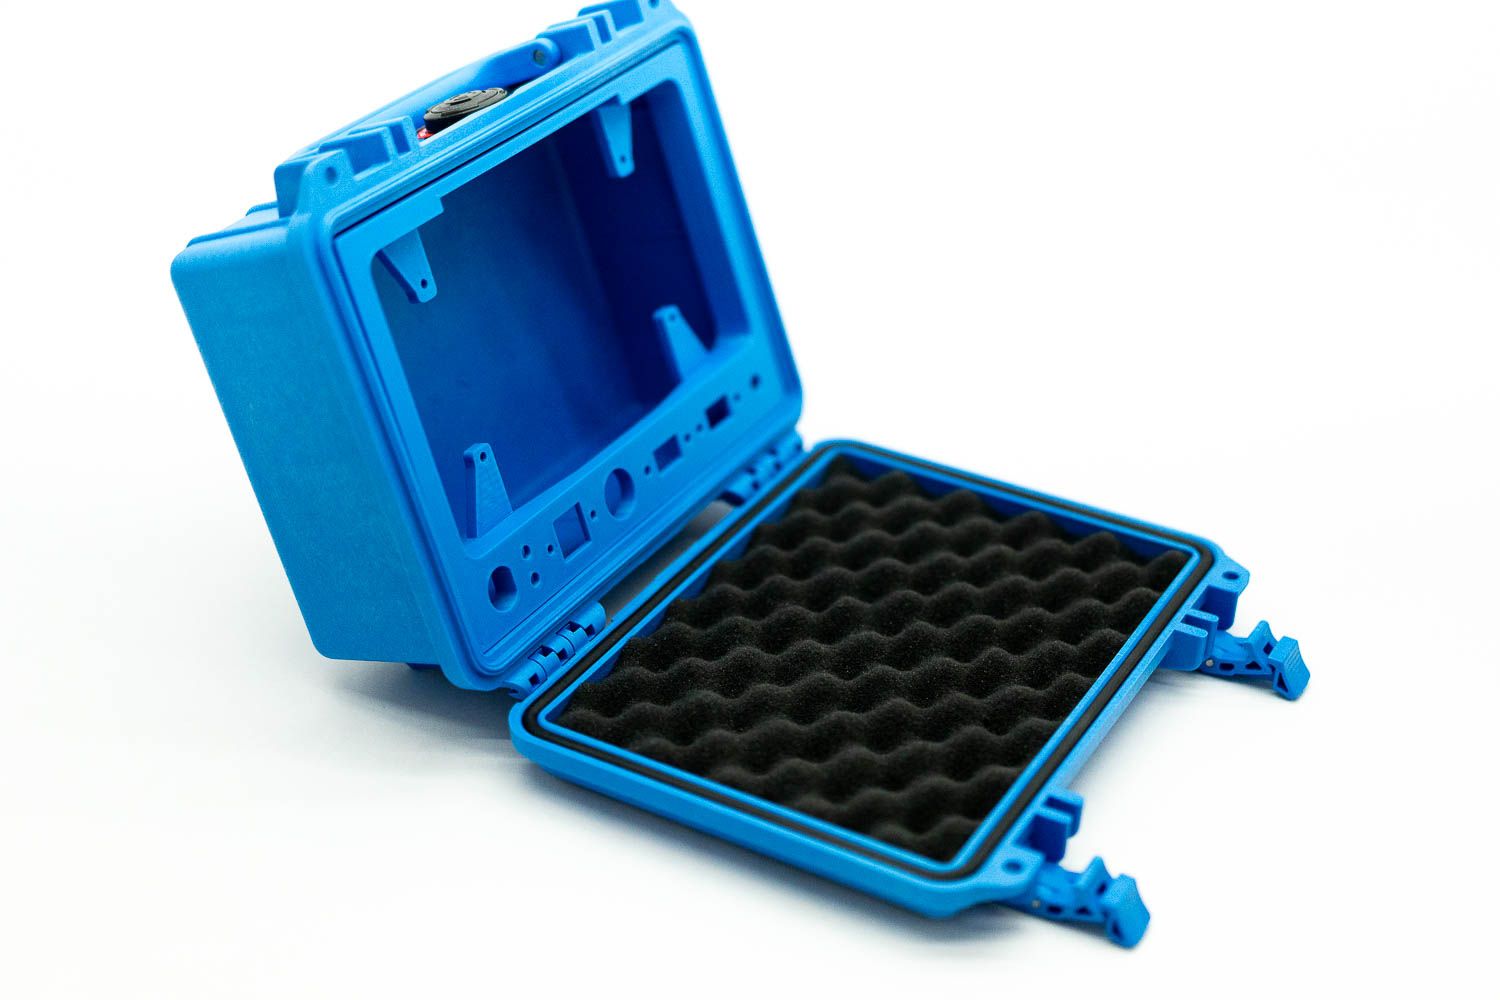
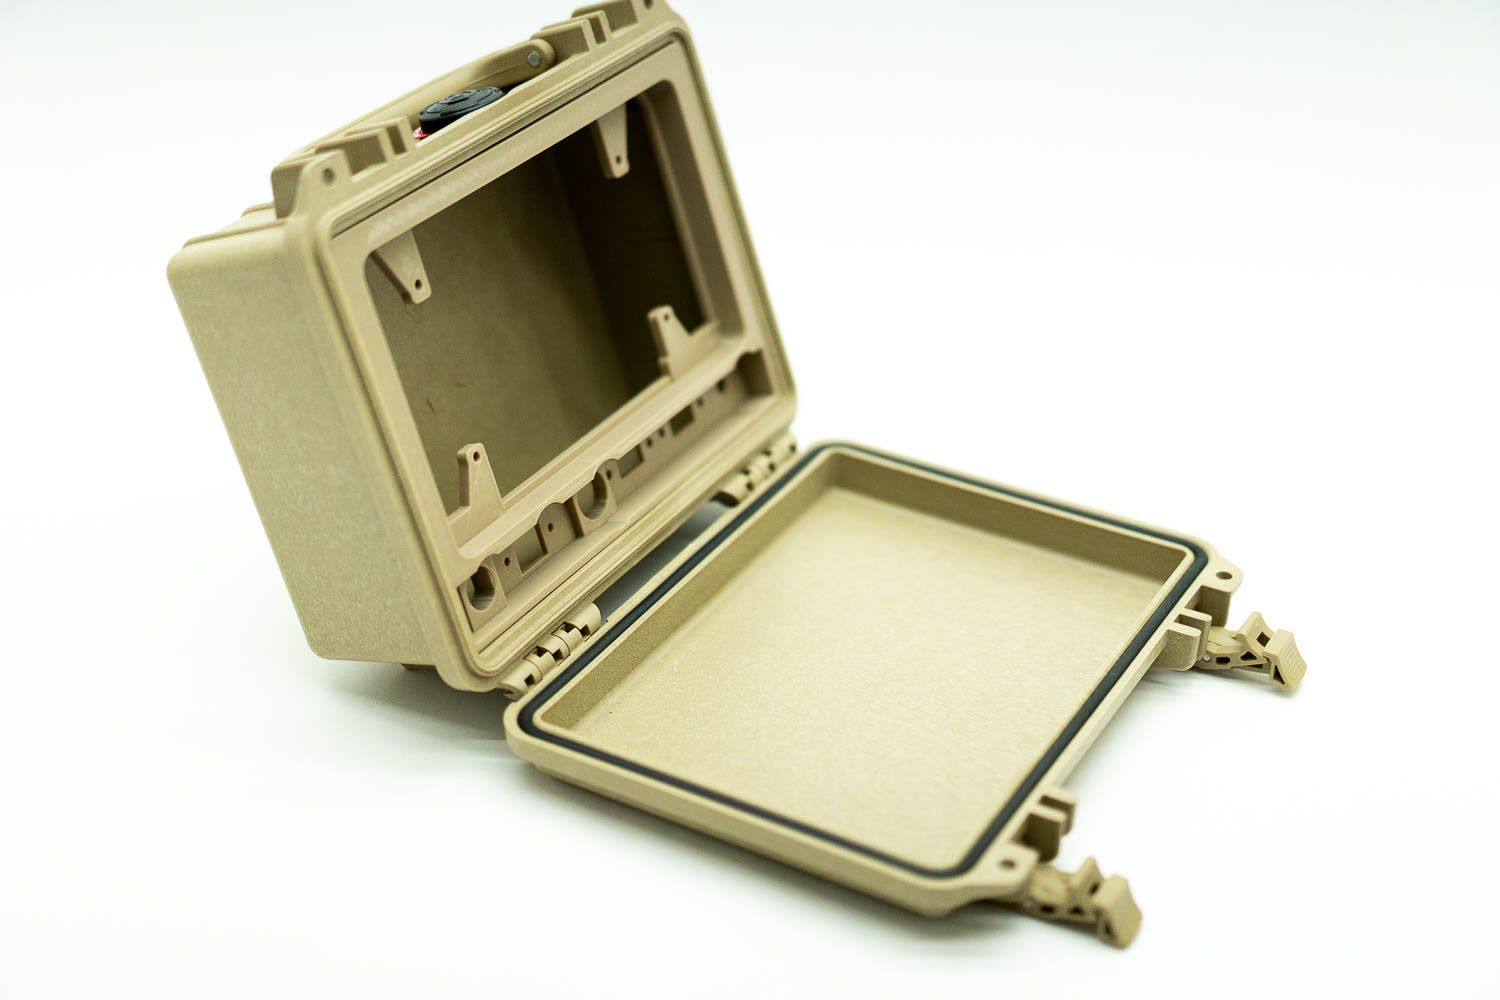
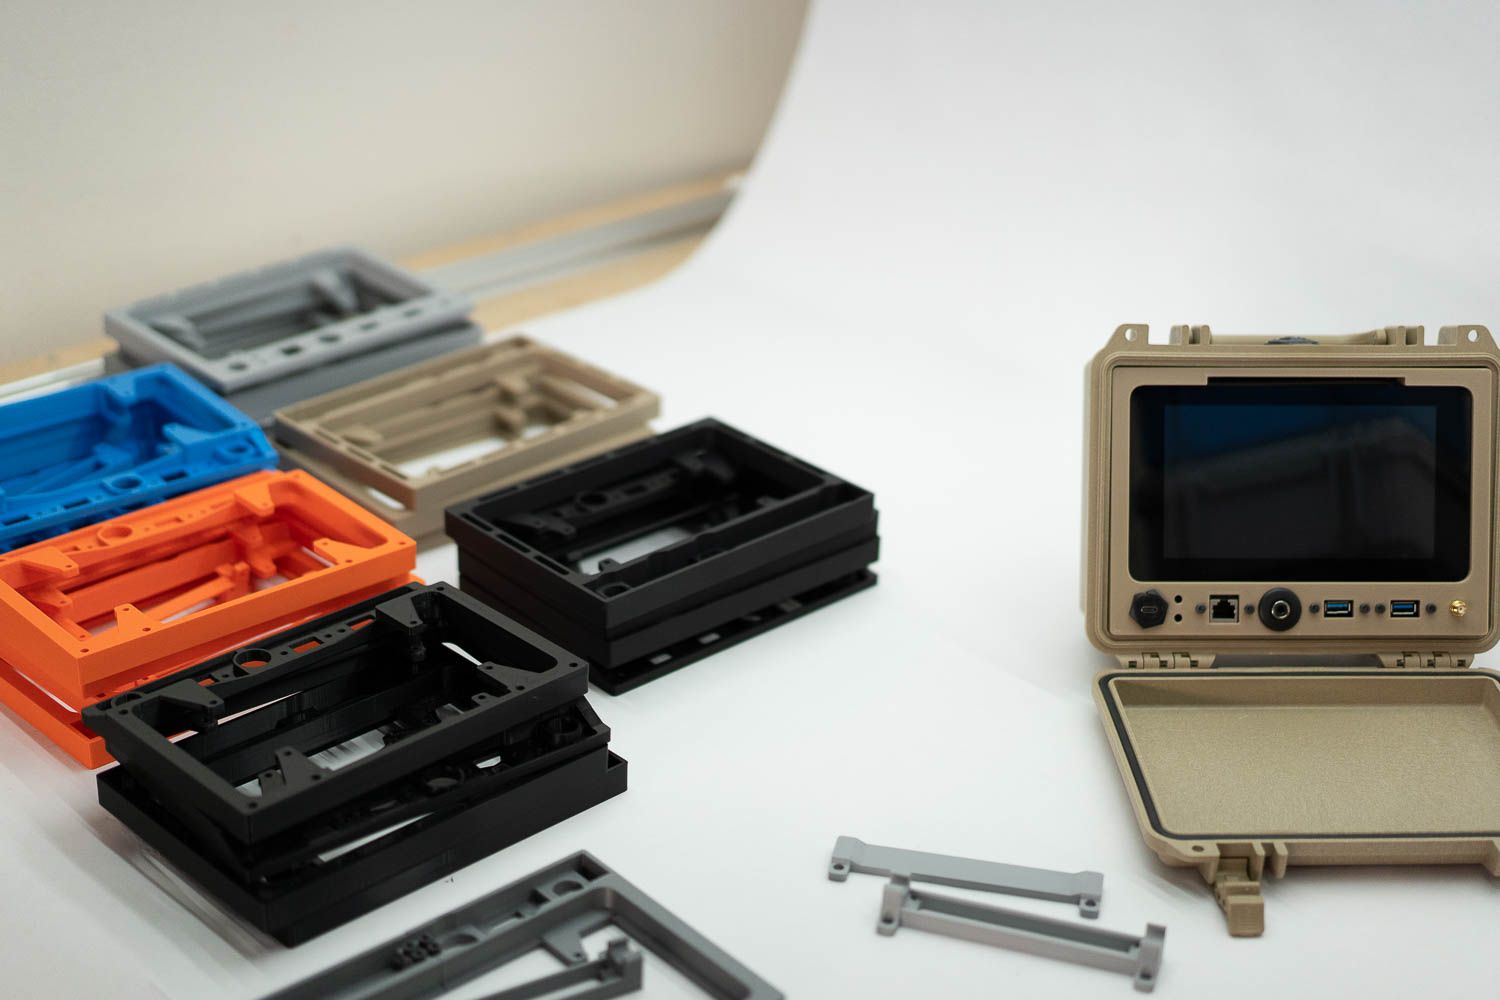
- Color Variants: We offer parts for sale that match nearly every color available for Pelican's 1150 enclosures.
To give you a visual tour of these exciting changes, here's a quick overview with photos of each of the new variants:
Quick Kit - Unibody is shown below- a single light part designed to be as simple as possible to assemble. You can purchase the 3D printed part here, or the design file here.
Quick Kit - Unibody Vented is shown below- a single light part designed to be as simple as possible to assemble, but with some extra venting at the top- helpful for the projects that run warm. You can purchase the 3D printed part here, or the design file here.
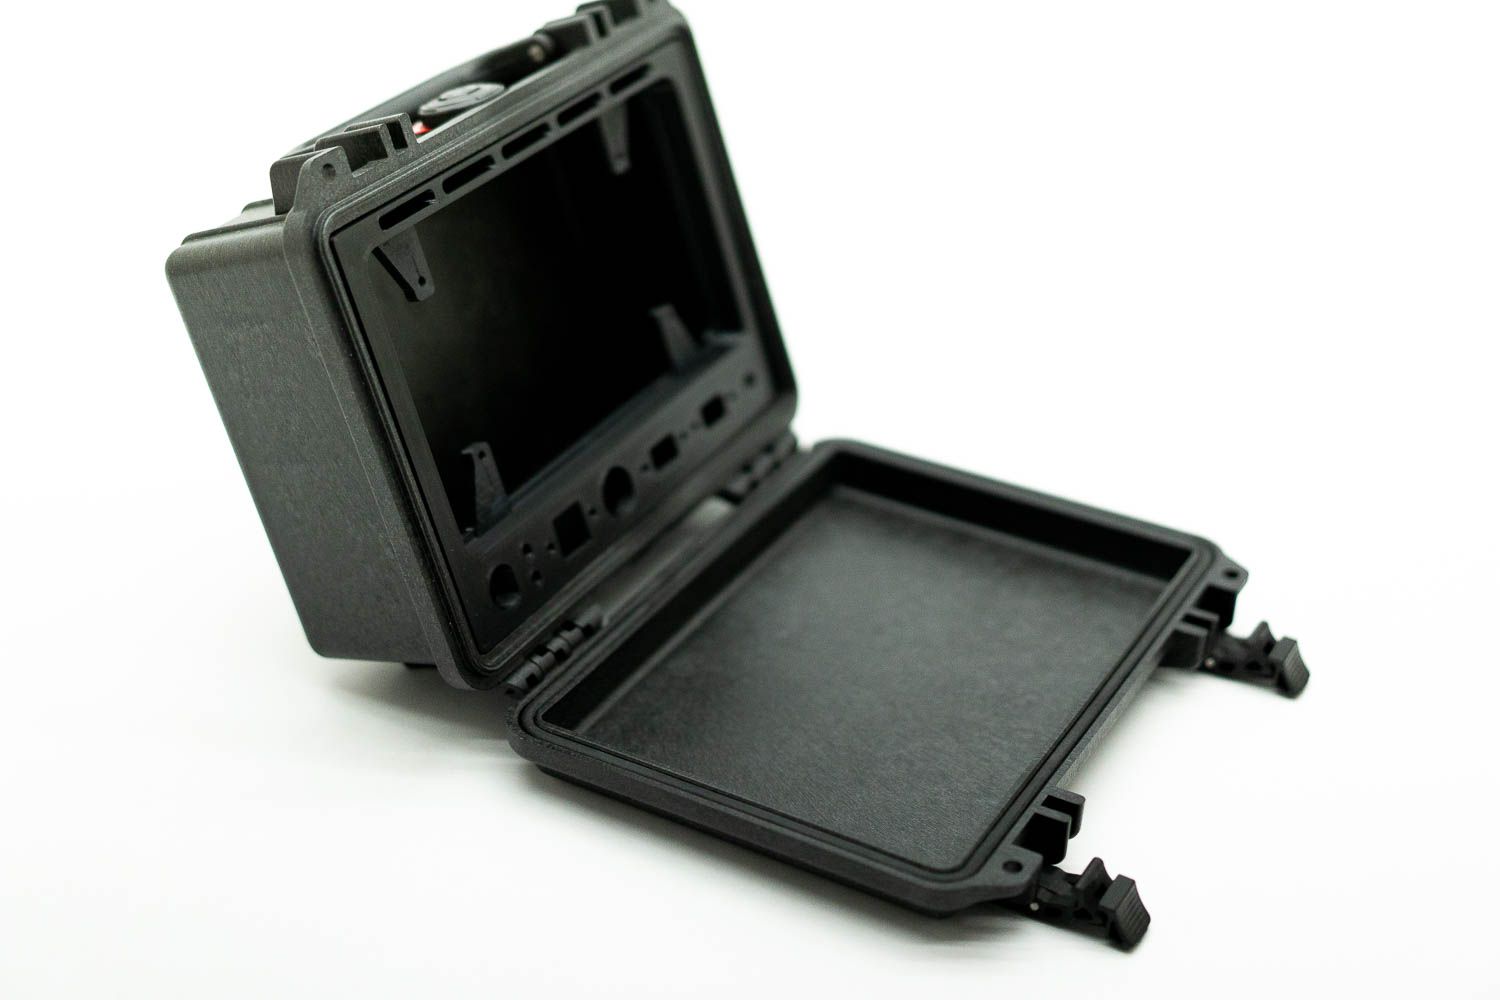
Quick Kit - Retroversion is shown below- a single rugged part designed to be tougher than the Unibody, but still really easy to print. This variant has nearly no venting. You can purchase the 3D printed part here, or the design file here.
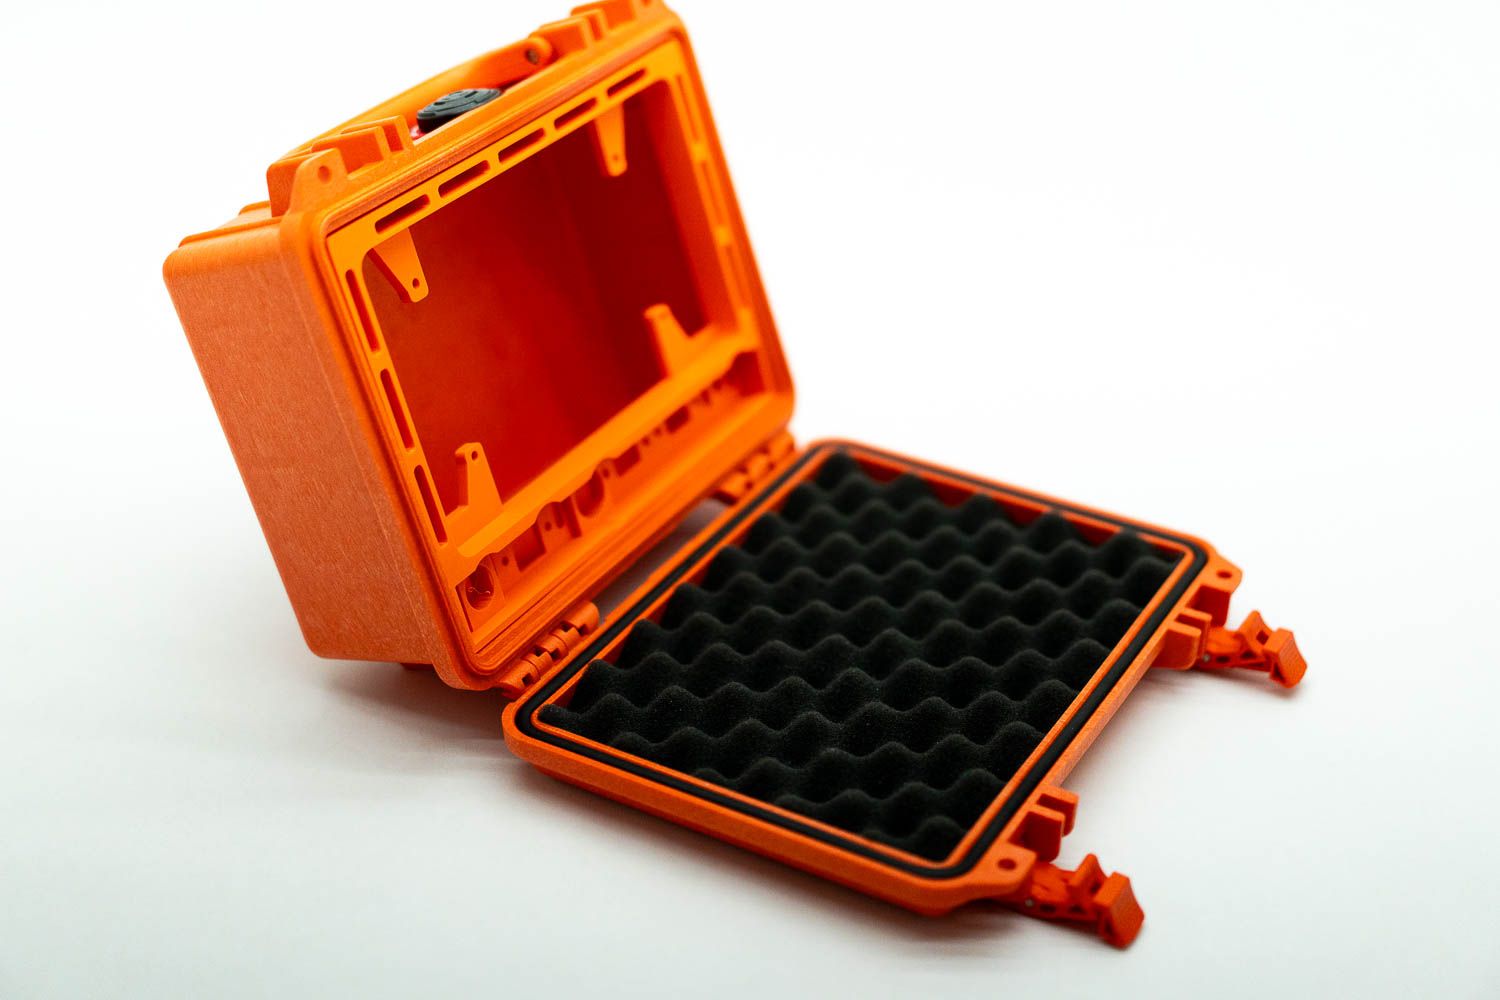
Quick Kit - Retroversion Vented or the "skeleton" is shown below- a single rugged part designed to be tougher than the Unibody, but still really easy to print. This variant has as much venting as I could add- there are vents on the top and sides, and small vents between the ports below the screen where possible. You can purchase the 3D printed part here, or the design file here.
Quick Kit - Mini is shown below- a collection of 4 parts designed to be as rugged as possible, while still being printable on 3D printers like the Bambu A1 or Prusa Mini. Each part is designed to print well on the common smaller print bed of 180mm x180mm. This variant has nearly no venting. You can purchase the design file here.
The Internal Frames serve as a proof of concept for enhancing the Quick Kit with modular features. I've developed two types:
- The flat one is a blank canvas, intended for users to customize by hacking and drilling to mount their required components onto it.
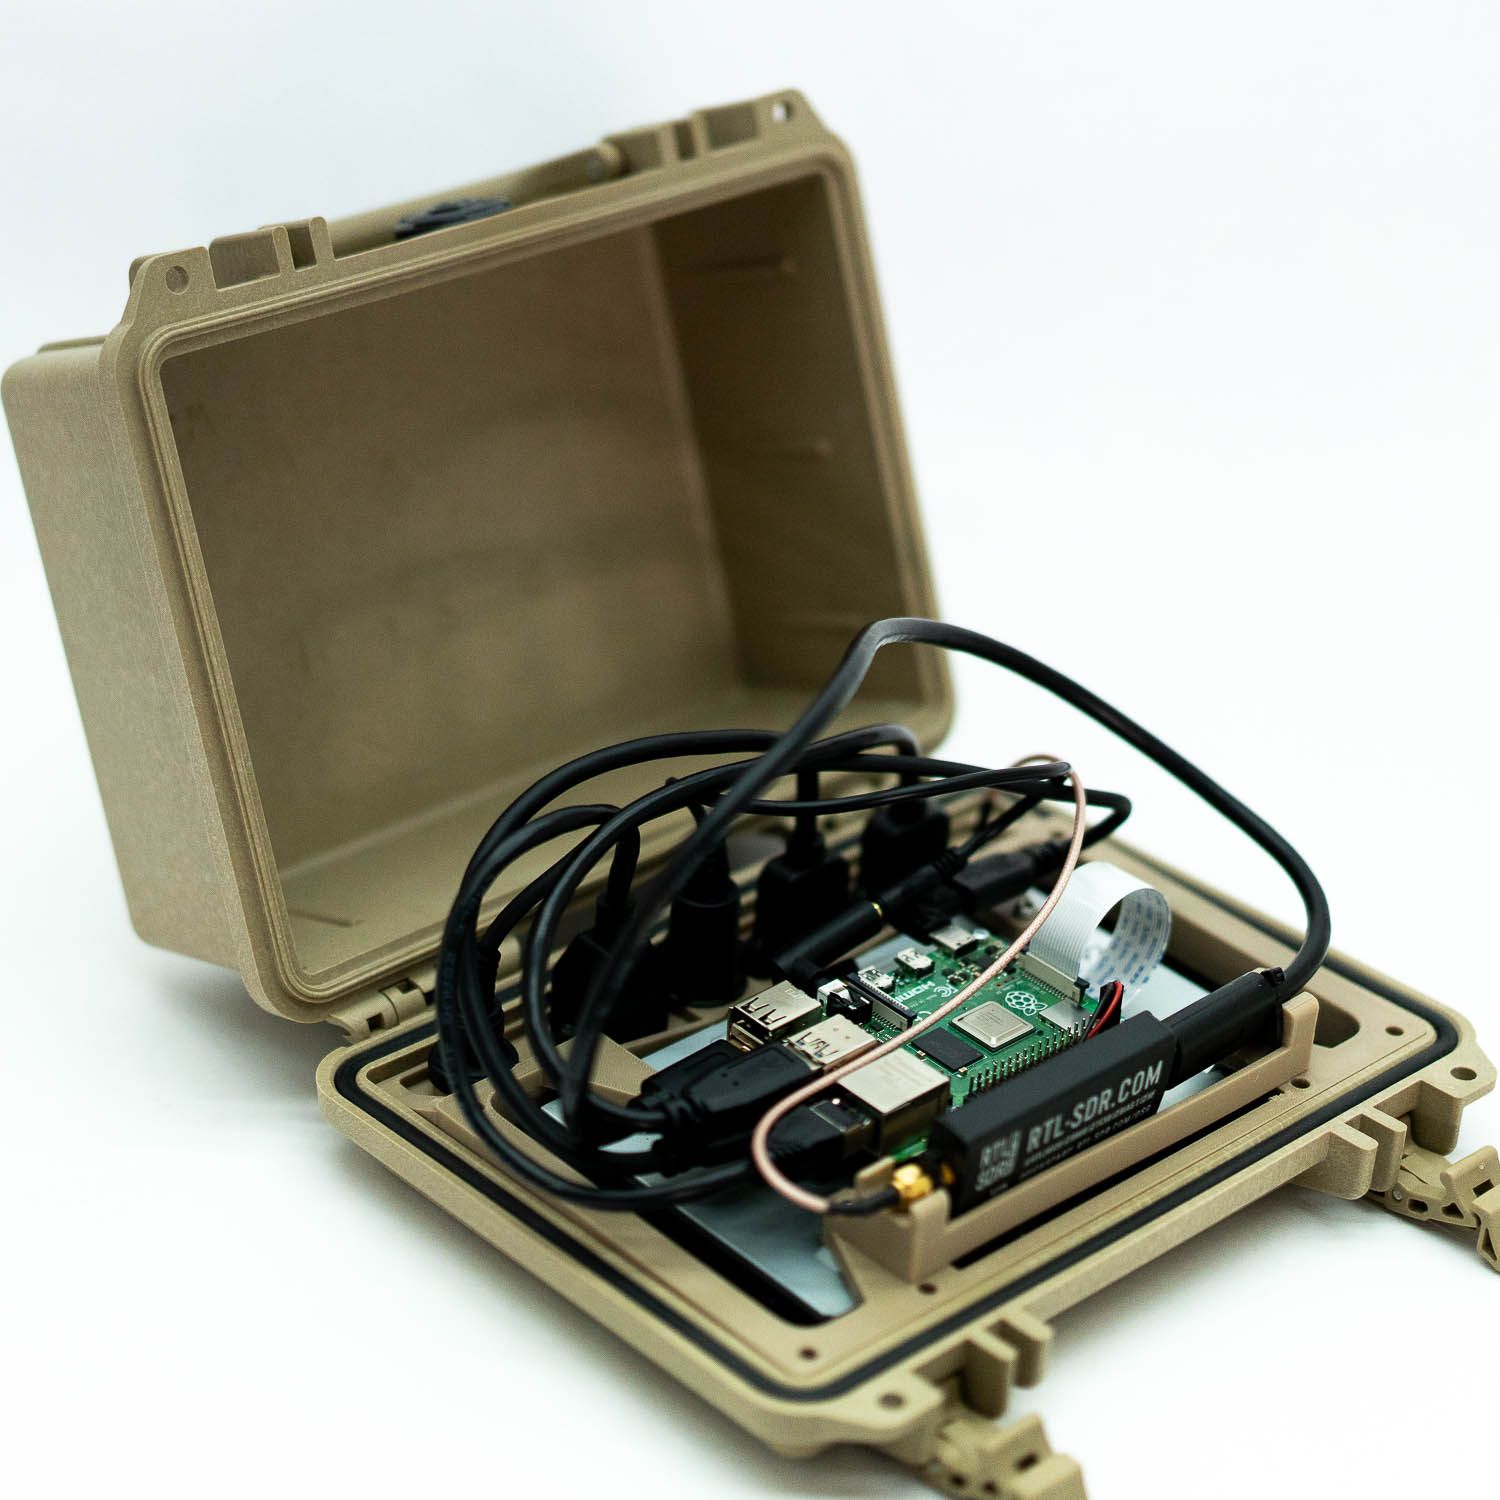
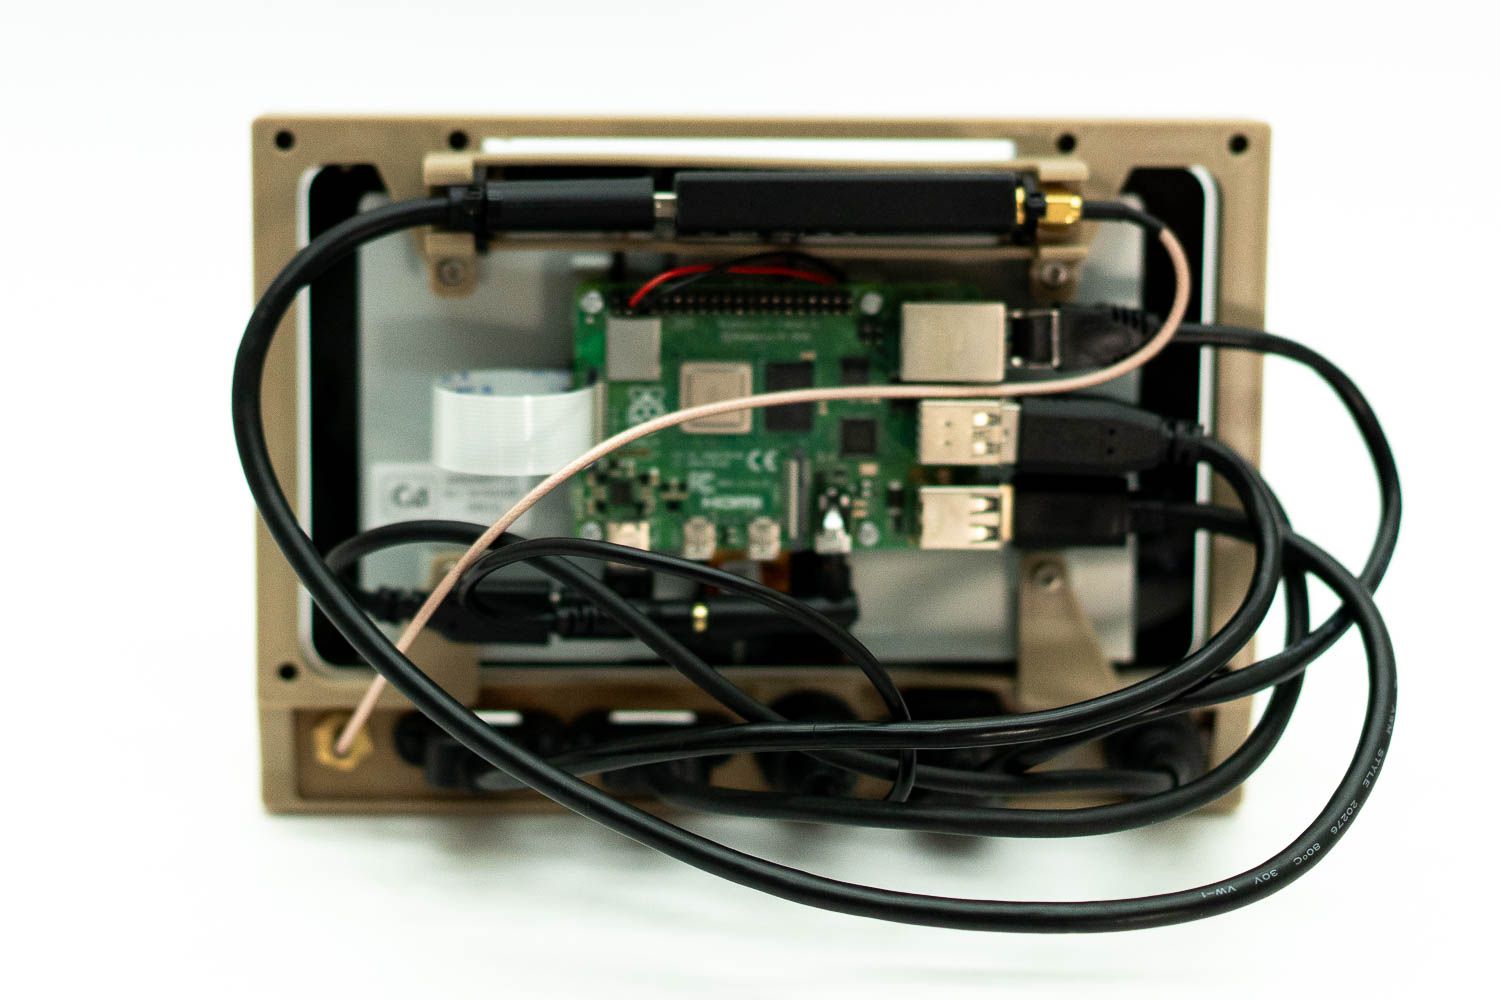
- The uniquely shaped frame is designed specifically to safely hold an RTL-SDR radio dongle without causing any short circuits with the Raspberry Pi inside the case. It's also strategically positioned to align closely with the vents on the top of the frame. Additionally, there are small holes provided for zip ties, which have proven to be quite useful in this design.The Internal Frames serve as a proof of concept for enhancing the Quick Kit with modular features. I've developed two types: 1. The flat one is a blank canvas, intended for users to customize by hacking and drilling to mount their required components onto it.2. The uniquely shaped frame is designed specifically to safely hold an RTL-SDR radio dongle without causing any short circuits with the Raspberry Pi inside the case. It's also strategically positioned to align closely with the vents on the top of the frame. Additionally, there are small holes provided for zip ties, which have proven to be quite useful in this design.

The design concepts I've integrated here are quite straightforward, and I'm sharing them in the hope that they might inspire some of you. If they do, please don't hesitate to reach out and share your creations! Links back to doscher.com are always appreciated.
- Modern Printing: I began my 3D printing journey with some "firestarter" printers years ago but have since been using Prusa MK2 & MK3 variants. Recently, I upgraded to a Bambu X1C with AMS, allowing me to explore the possibilities offered by more modern printers equipped with features like breakaway support filament, which has proven to be incredibly useful.
- Enhanced Ventilation: I aimed to provide even more effective ventilation compared to previous designs. Although I developed these designs before the Pi5 was announced, I had a feeling that extra cooling capacity would be a valuable addition.
- Upgraded Ports: As mentioned earlier, this design required additional ports, including an SMA connector for SDR enthusiasts.
- Simplified Modification: My goal was to make assembly as user-friendly as possible while also ensuring that the design remains easily modifiable using the STL file. Time will tell if I've succeeded in achieving this balance.
- Comprehensive Incorporation: After stepping away from the design for a few years, my objective was to incorporate all the ideas and feedback accumulated during that time into this version. I wanted to leave no stone unturned, and to address any inquiries about battery inclusion, there hasn't been much room for that.

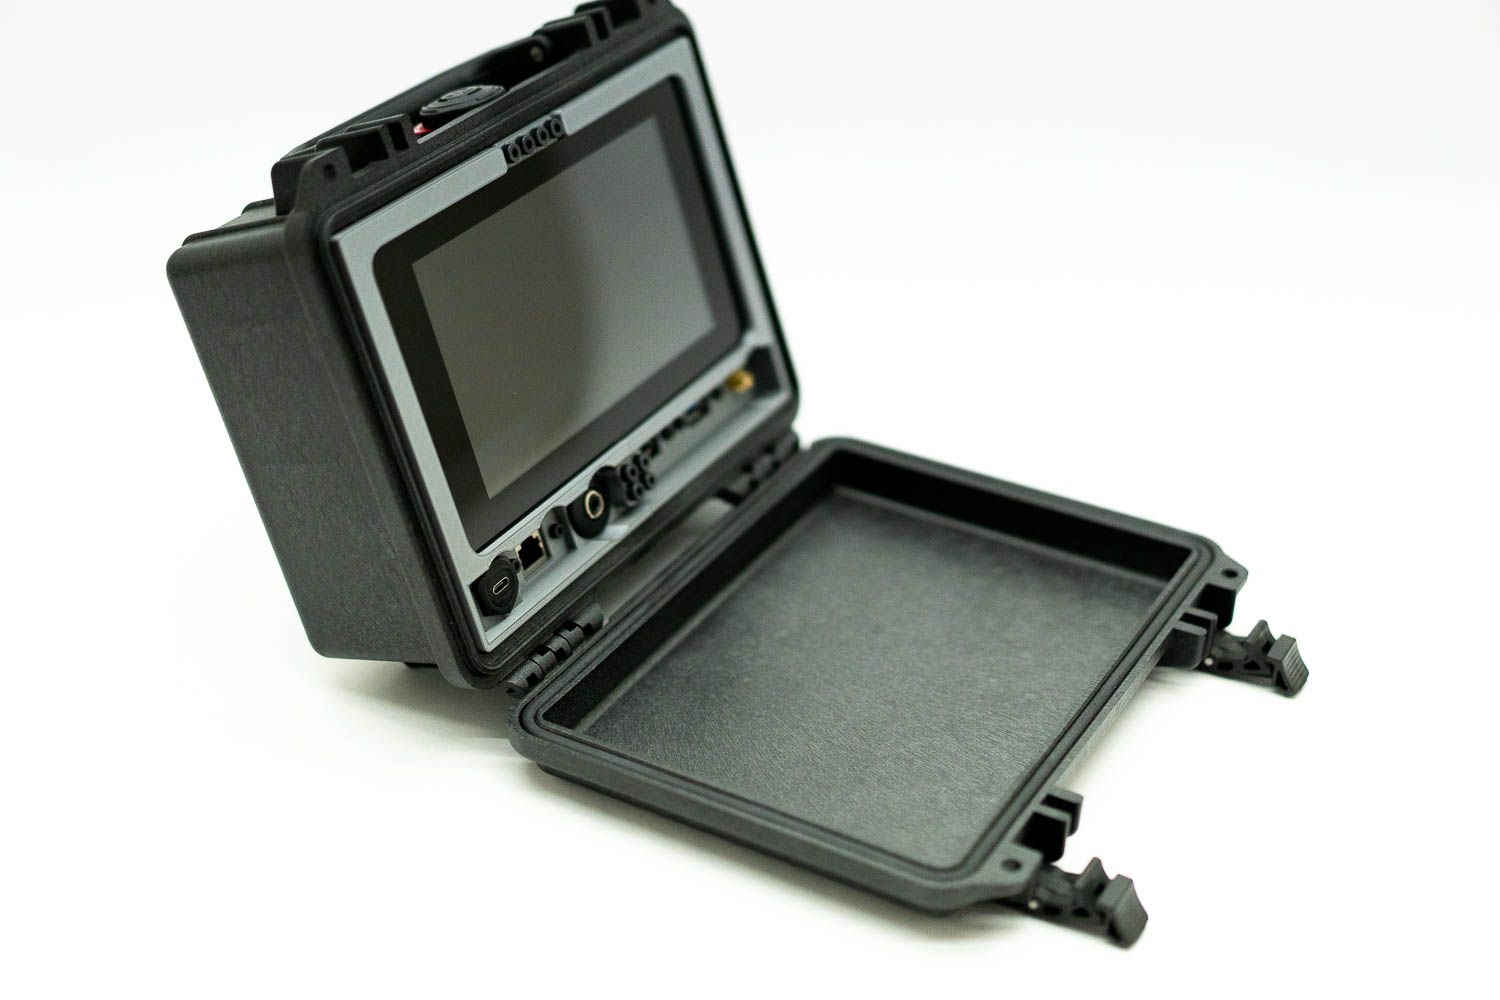
Above is a photo of a fully assembled kit, with the internals shown below. This runs DragonOS great, just as it does Raspberry Pi OS. Fully assembled versions are for sale, but because of shipping and assembling, I really do recommend you build one yourself! The parts link is just below under the photo:
Parts List:
- Pelican 1150 Case - https://amzn.to/3PI0v0s
- (See this post for details on options for the 7" display)
- Raspberry Pi Official 7" Touchscreen - https://amzn.to/3F0Qc2J, or https://amzn.to/49nuW5h, or https://www.raspberrypi.com/products/raspberry-pi-touch-display/ (keep in mind this display may be getting phased out if it's going out of stock everywhere)
- Raspberry Pi 4 (8GB model recommended) - https://amzn.to/46k9c8A
- Doscher.com Frame - https://shop.doscher.com/shop/kits
- Panel Mount Ethernet https://amzn.to/46uPlmE
- Panel Mount USB 3.0 - https://amzn.to/3RJ3KHU
- Panel Mount SMA Connector - https://amzn.to/3PY133N
- Panel Mount USB C Power Connector - https://amzn.to/3PYEUT0
- Panel Mount Headphone Jack - https://amzn.to/3LP8tUr
- Right Angle Headphone Jack Adapter - https://amzn.to/3Q0U4XK
- Right Angle USB C Connector - https://amzn.to/3LKqeEC
- USB Extension Cable - https://amzn.to/48BWIKQ
- RTL-SDR Dongle - https://amzn.to/3PHSjgG
- M3 x 8mm screws (10 total)
Co-launching with this article is a guide on how to assemble a Quick Kit! You can find that article here.
Lastly, thank you to all the paid subscribers for your support! It makes a huge difference in the projects I can take on. I appreciate all the signups for the free subscription too! It lets me send articles directly to you, and that's pretty cool too.
Comments ()